How-to Configure the Cycle Time Widget
Summary
The Cycle Time Widget in Production Wrokbench is a progress bar which tracks the initial serial scan of the client. This widget shows in real time the progress of the Shop Order. In order to see the progress bar, it is necessary to set a configuration at the Generic Attribute Maintenance. After that, there are two routes which the user can choose from: continue the configuration by SQC Configuration or by Target Maintenance.
Generic Attribute Maintenance
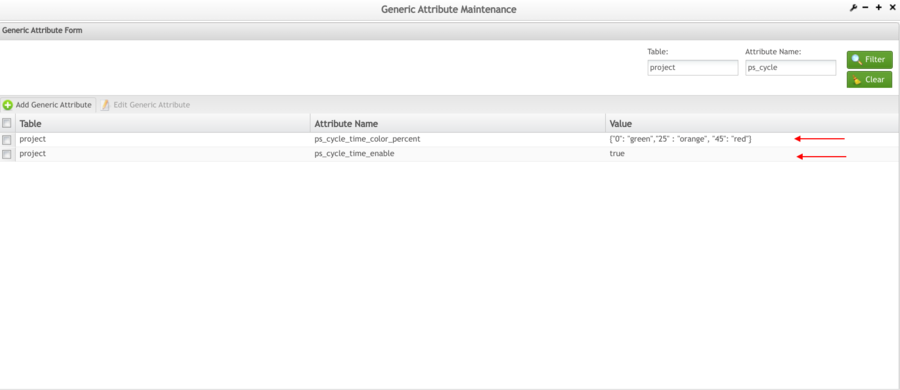
To enable the Cycle Time Widget,
- Navigate to Administration > Generic Attribute Maintenance
- Enter PRoject in the table field and enter Cycle in the Attribute Name field
Figure 1: Generic Attribute Configuration
- Set the ps_cycle_time_enable attribute in TRUE
- Set the ps_cycle_time_color_percent attribute in the colors as needed; 0--->50% GREEN; 50--->99% ORANGE, 99% or more RED
For more information about Generic Attribute Maintenance, please refer to Generic Attribute Maintenance
SQC Configuration
The primary configuration for the standard time (TAKT time) is defined in the SQC Configuration portlet or in the Target Maintenance portlet, the cycle time bar will not display.
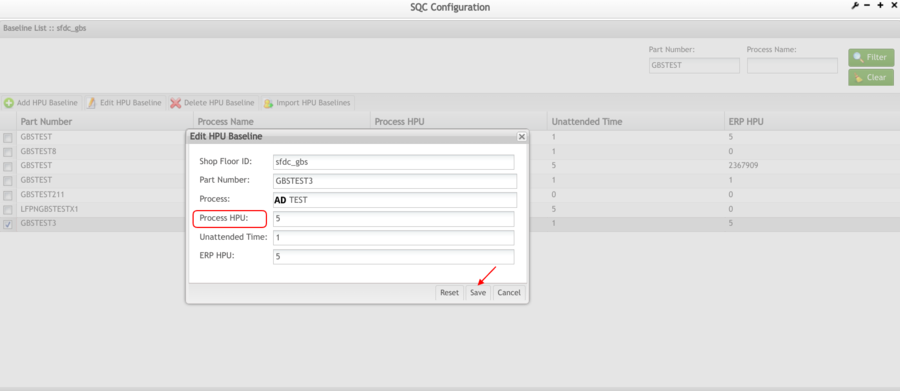
To configure the standard time, navigate to Shop Floor Control > Configuration > SQC Configuration
- Input the Part Numbber in the Part Number field and select
- Select the Part Number and click Edit HPU Base Line button
- Input Shop Floor ID, Part Number, Process, Process HPU, Unattended Time and ERP HPU
- Select Save
Figure 2: SQC Configuration
Target Maintenance
As previously mentioned, when the user can not configure the standard time (TAKT Time) in SQC Configuration, it needs to be configured in Target Maintenance
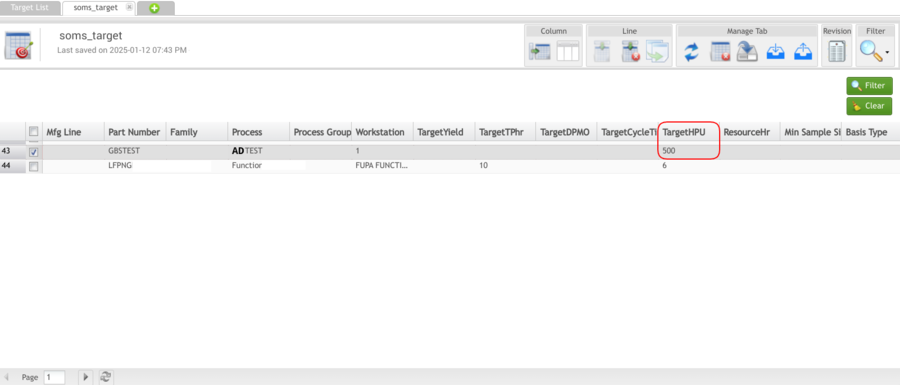
To configure the standard time, navigate to Shop Floor Control > Configuration > Target Maintenance
- Input the Target Name in the Target Name Field and select the filter button
- Double click the Target Name, a new window will appear
- Select the Mfg Line, double click on the Target HPU and input the desired time. Users can configure easily by part numbers, process name, and defining the time (which is presentes in 'seconds')
- Select Save to keep the changes or Cancel to abort
Figure 3: Target Configuration
For more information about Target Maintenance, please refer to How-To use Target Maintenace
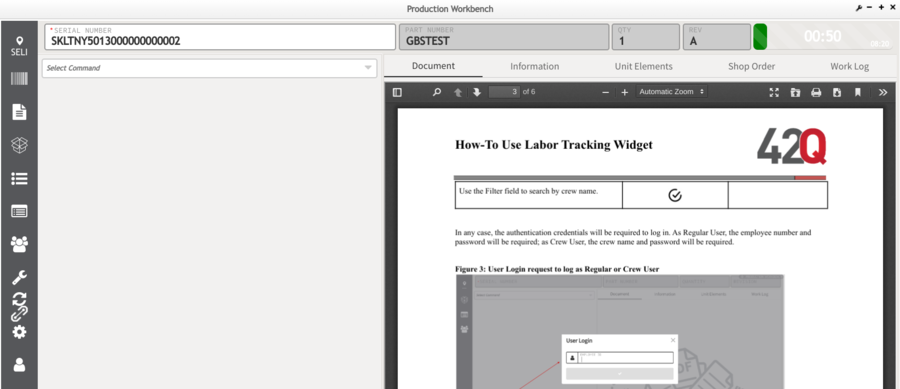
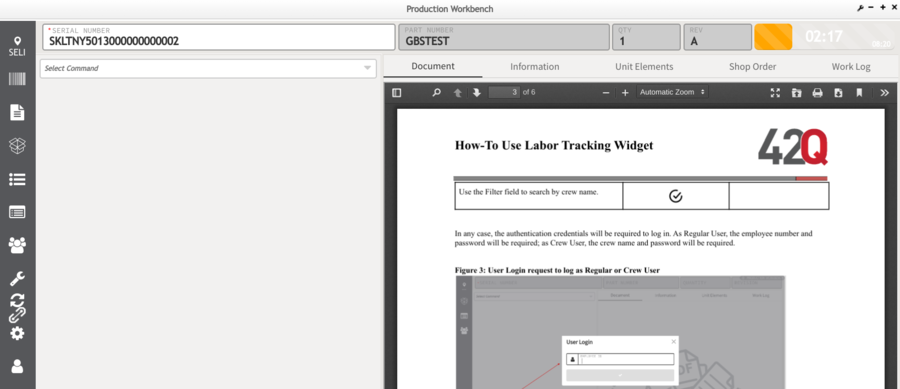
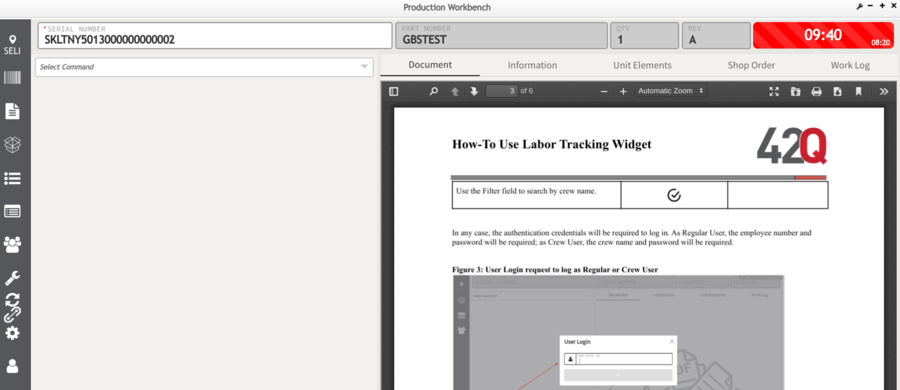
Once all of the configurations are completed, the progress bar will display according to the set values in the Generic Attribute Maintenance:
Figure 4: Initial Progress Bar
Figure 5: Progress Bar with less than 90%
Figure 6: Completed Progress BAr
