42Q-MES0112-C Configuration Publish
42Q Home > Shop Floor Control > Configuration > Configuration Publish
Contents
Introduction
The Configuration Publish Portlet is used to publish configuration changes for use with Conduit and has the ability to automatically or manually publish these configurations within the portlet.
To access the Configuration Publish page, navigate to Shop Floor Control > Configuration > Configuration Publish.
Figure 1: Configuration Publish Access
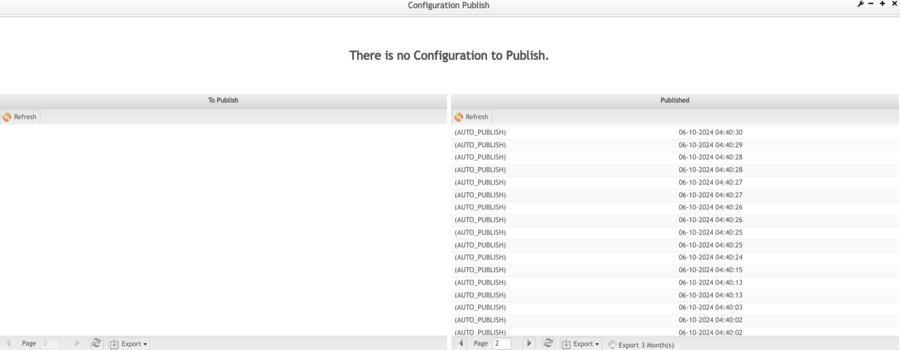
This portlet displays a top panel with two grids underneath: To Publish and Published. The top panel displays the number of pending configurations to publish.
Note: If there are pending configurations that need to be manually published, the Publish All button will display. Pending configurations appear in the To Publish list, while changes already published are viewable in the Published list.
Auto Publish
Configuration Publish will automatically publish configuration changes when the auto-configuration generic attribute is active.
To use auto-publish,
- Navigate to Administration > Generic Attribute Maintenance
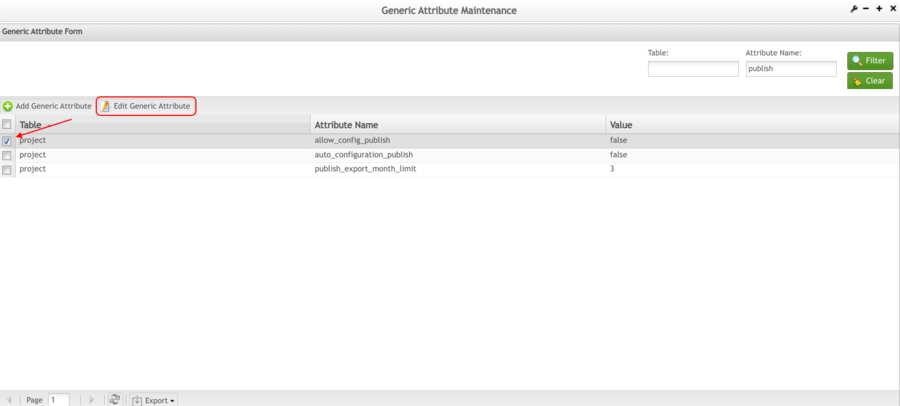
- Search the generic attributes “auto_configuration_publish” and “allow_configuration_publish”, select the Generic Attribute and select the Edit Generic Attribute to edit the value. For more information on setting generic attributes, see Generic Attribute Maintenance.
Note: If the generic attributes are not added, Configuration Publish will be disabled and the user will have to manually add both generic attributes.
Figure 2: Auto Configuration Publish
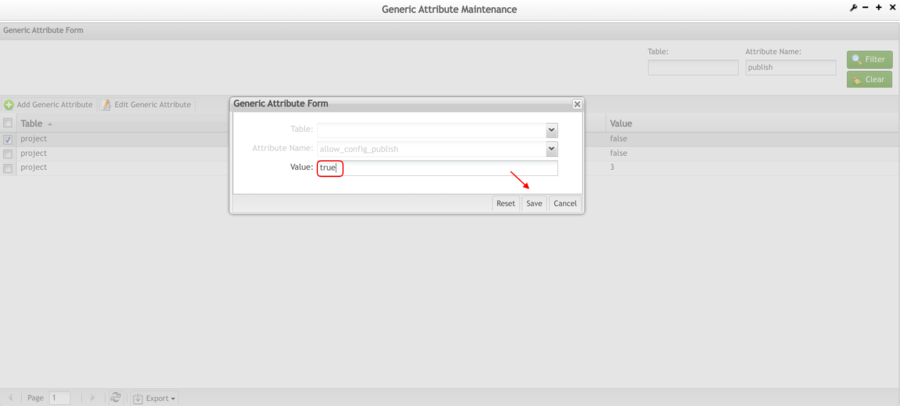
- A pop-up window will appear with the Table, Attribute Name and Value. Set the value to “true” and select Save.
Figure 3: Edit Value
Once this is done, the saved changes will be automatically published in SFDC Configuration.
Manually Publish
When changes need to be published and Auto Publish is not configured, users can manually publish the configurations.
To manually publish,
Navigate to Administration > Generic Attribute Maintenance.Check the generic attribute "auto_configuration_publish" and "allow_configuration_publish" set it to "false" if the attributes value are set as "true".
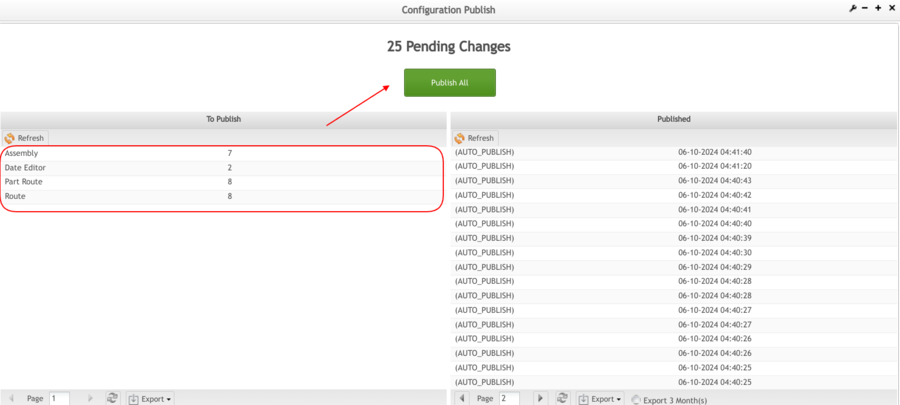
Pending changes to publish will display in the To Publish grid.
Figure 4: To Publish List
- Select the Publish All button to publish all pending configurations.
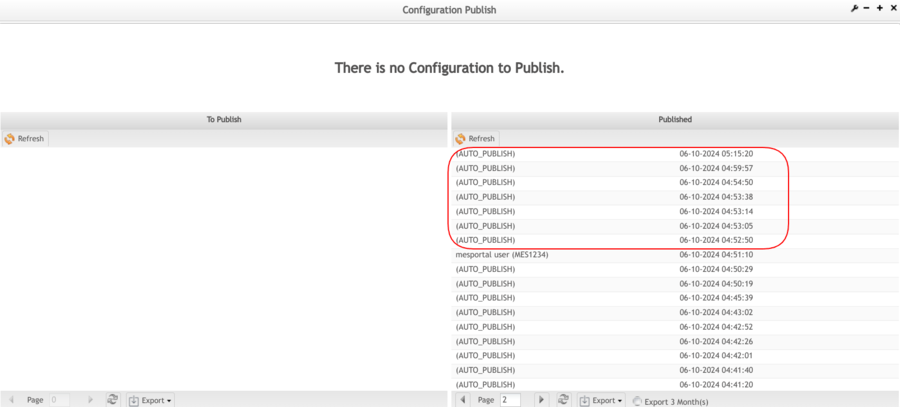
Once the publishing process has been completed, the published configurations will be removed from the To Publish list and appear in the Published list.
Figure 5: Published List
To view detail about the pending or published configurations,
- Double click the desired configuration from the corresponding list to open the Details pop-up window.
The Details pop-up window displays the following fields
- Origin - The area where the configuration was made.
- Event - Tells whether the change was new (INSERT), an UPDATE, or DELETE.
- Qty - Quantity
Figure 6: Details pop-up window
Export
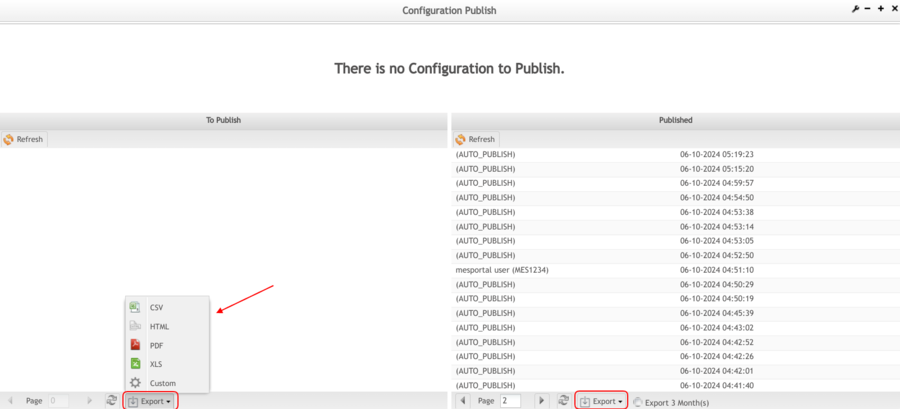
Both, To Publish and Published can be exported to several different file types.
To export a grid list, select the Export button for the desired grid, then select the desired file type, an automatically file will be downloaded onto the user's desktop.
Supported file types:
- CSV
- HTML
- XLS
- Custom
Note: The Custom option is used to export only selected fields.
Figure 7: Export
Export the last 3 months
To reduce the retrieving data time to export, the application provides an option to export data for the last 3 months instead of all data since the first day. SelectExport to get the report from the last 3 months
Figure 8: Export the last 3 months
