SOP-5-I-42Q-MES0106-C 42Q APK
This edition applies to MES 15 Portal 1.0 and all subsequent releases and modifications until otherwise indicated in new revisions.
Legacy documentation for Cirrus APK can be found here
Contents
Introduction
42Q provides three solutions to manage tablet use on the factory floor:
- AppGarden (Installed on every tablet): Allows installation and updates on Android mobile devices
- APK (Android Package Maintenance): (MES Portal): Serves as a repository for Android tablet applications
- Android Device Maintenance (MES Portal): Manages the tablets
Used together, the tools serve two important purposes:
- Control permissions for tablet users.
- Stream updates and configure installation to tablet applications.
NOTE: Prior to release, the tablets must be configured by an administrator. For more information on how to configure the tablet’s Host, Station ID, or Unit ID, please refer to the Administrator Pre-Configuration section of this document.
Hardware and Software Requirements
Supported Android OS
Android OS version :
Android 4.2.2 above
Suggest Android OS version is OS 7 above
Bundled package:
AppGarden
42Q APK
Administrator Pre-Configuration
Before a user may begin using the application, the Administrator must set up the device by entering the administrator password and setting the Host and Station ID. Once completed, the device is ready for data collection.
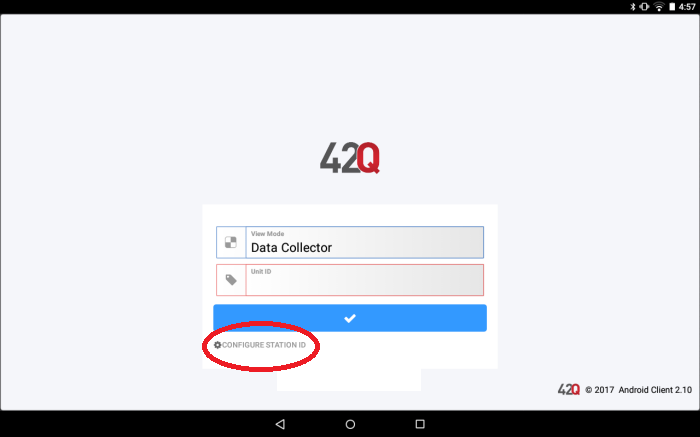
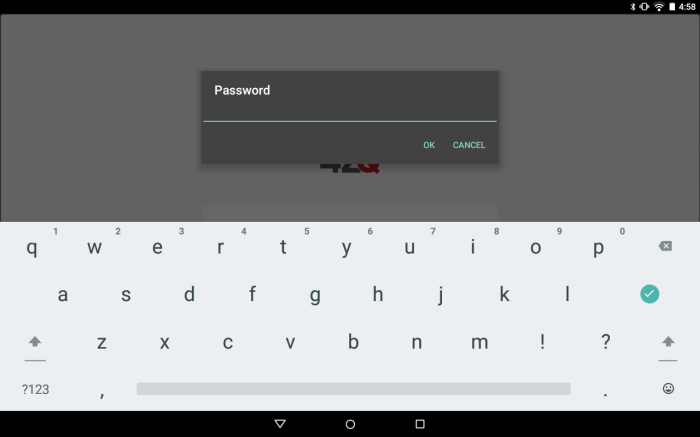
1. On the initial landing page, select the Configure Station ID button to display the Administrator password prompt.
Figure 1: Initial Landing Screen
Figure 2: Administrator Password Prompt
2. Enter the Administrator password and select OK.
3. To proceed with setup, enter a Host in the entry field and select the Reload Station ID button.
Figure 3: Host and Station ID Selection
Once a successful connection has been made, the Station ID may be selected and the appropriate Unit IDs will be populated.
4.Select the language from theChoose Language dropdown menu. Support English and Chinese from Version V2.23.
NOTE: The 42Q APK uses a built-in keyboard for ease of use, however for some Android versions, it may be helpful to disable the default keyboard to avoid conflict.
Access
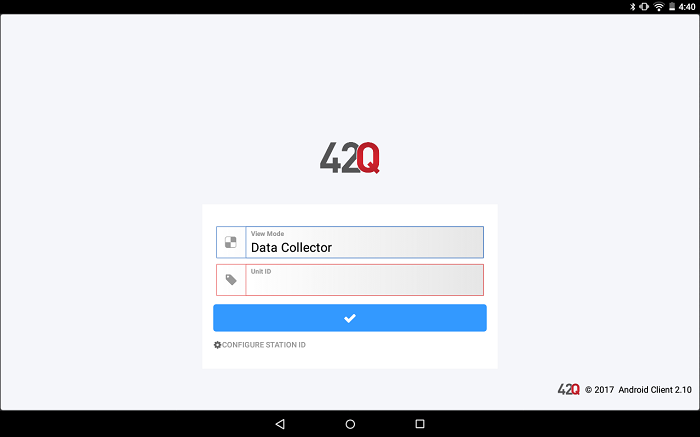
Once the Administrator has launched the 42Q PSI application and entered the Host andStation ID, the user can select a default view mode and Unit ID.
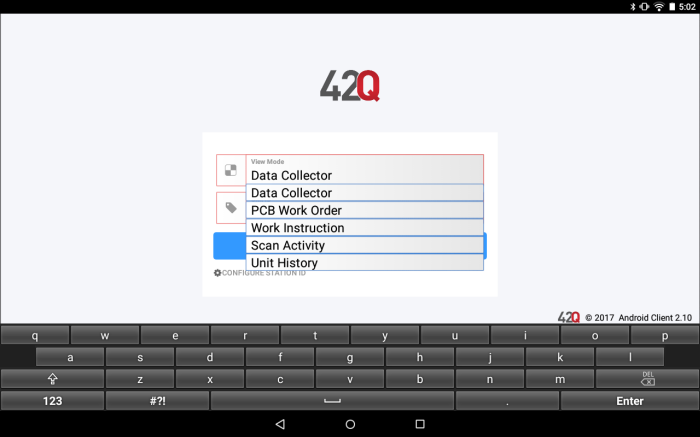
The following Operation Modes are available to the user:
- Data Collector
- PCB Work Order
- Work Instruction
- Scan Activity
- Unit History
- View Traveler Mode
NOTE: The Operation Mode selection dictates the default view upon logging in. All other view modes are available (unless PCB Work Order is selected) in tabs from the Data Collector screen.
1. To log into the mobileData Collector, select a Operation Mode from the drop down list provided.
Figure 4: Operation Mode Selection
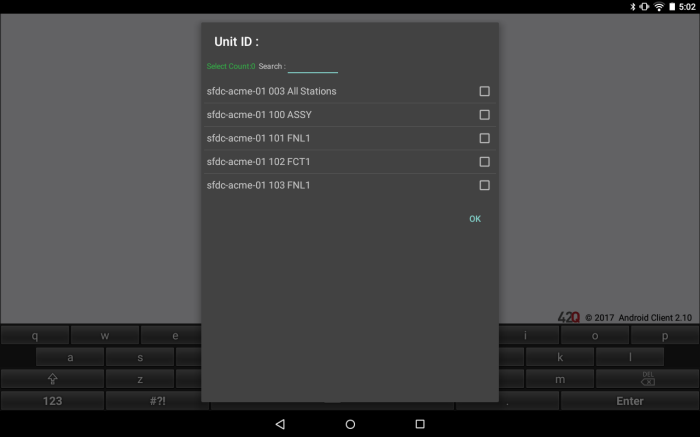
2. Select a Unit ID from the list provided.(The Unit ID list is created from the Device Maintenance portlet in 42Q.)
Figure 5: Unit ID Selection
3. Select OK to log in to the mobile Data Collector.
Figure 6: Log In
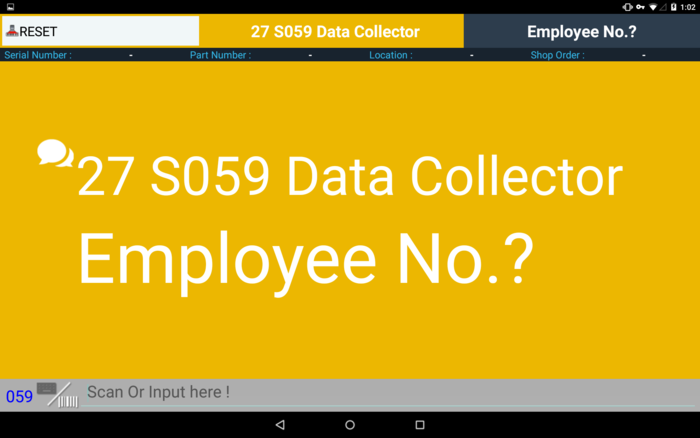
4. The initial log in screen prompts the user for an Employee Number.
Figure 7: Initial Log In Screen
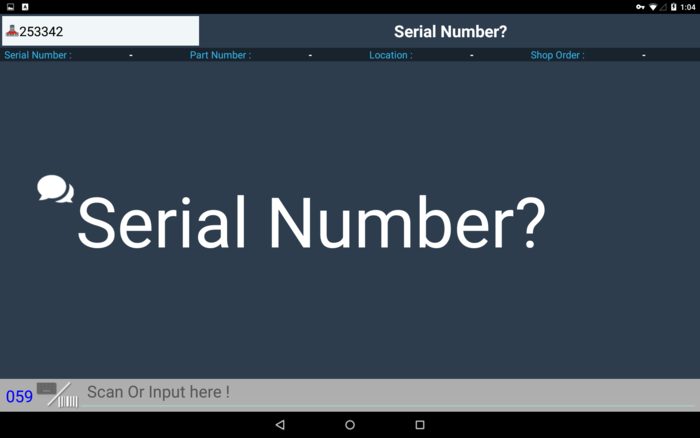
5. Once an Employee Number is entered/scanned, the default operation mode will display.
Data Collector Mode
After selecting the Data Collector view mode and entering anEmployee Number, the device is ready to begin data collection.
Figure 8: Data Collector Default View Mode
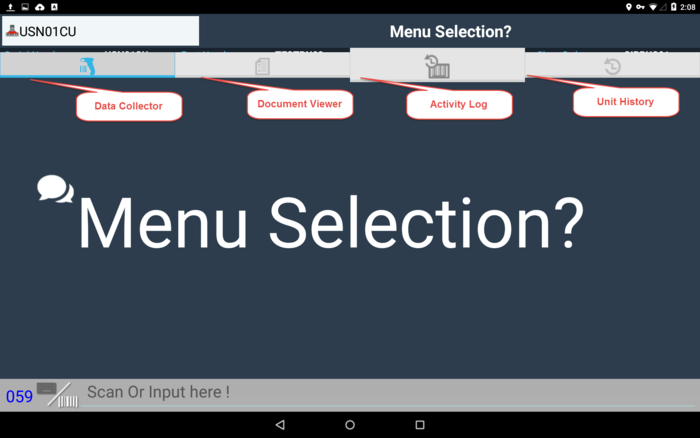
If it is necessary to change view modes, they can be accessed by tapping the top of the screen, as shown in Figure 9.
Figure 9: Additional Tabs
Work Instruction Mode
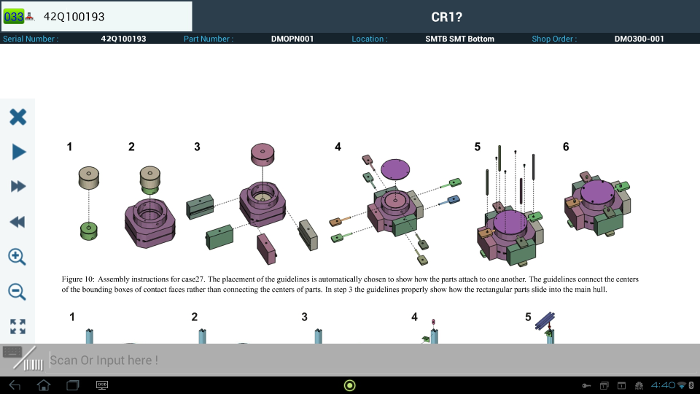
If Work Instruction was selected as the default operation mode, the screen will either display the default deviation, or the last uploaded document for the Part Number at that Process.
Figure 10: Work Instruction
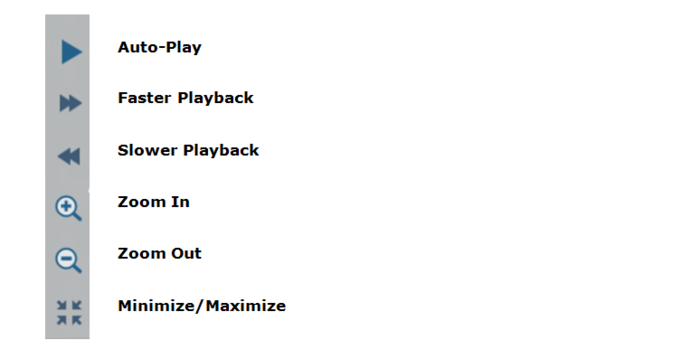
The following navigational controls are provided on the left of the screen:
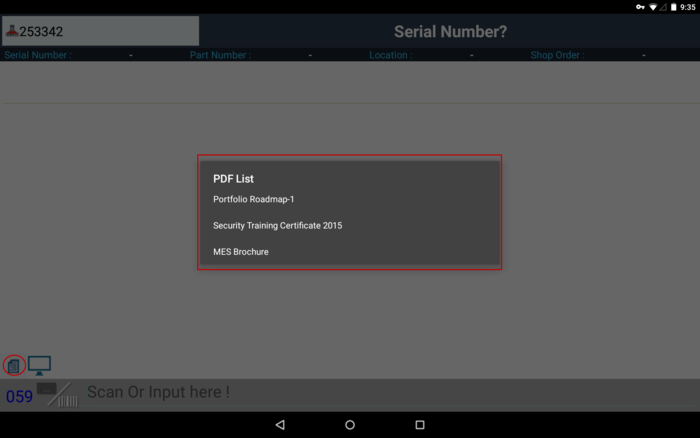
If multiple documents are uploaded for the serial's Part Number and Process, they can be accessed by closing the current document, then selecting the document icon in the input field at the bottom of the screen. All documents mapped to the scanned part number and process will display in a list for selection.
Figure 11: Multiple Document View
Scan Activity Mode
If Scan Activity was selected as the default operation mode, the following screen will display after entering an Employee Number:
Figure 12: Scan Activity View
Unit History
If Unit History was selected as the default operation mode, the following screen will display after entering an Employee Number:
Figure 13: Default Unit History View
NOTE: Currently, local and custom commands can be executed in the mobile data collector. Any action executed will display in the Unit History report tab.
Figure 14: Command Execution in the Unit History Tab
PCB Mode
The PCB Work Order mode is a customer specific tool that allows for non-serialized batch processing by interfacing with INPLAN-ERP. For more information, please refer to the MES for PCB documentation.
At the PCB Work Order mode, users can enter/display Shop Order Operator notes (release notes) similar function as on the Portal, the system allows users to add comments for the future steps. Note: Users can not add comments for the past steps.
The system has an icon for the users to add Shop Order Release notes or Work Order Operator notes for the future steps. Has an icon for the users to view the Shop Order release notes or work order operator notes. If users haven’t saved the comments then click exit, it will pop up an alert message “Are you sure to quit without saving?”.
View Traveler Mode
Users have to select View Traveler Mode from the Operation Mode dropdown menu and then select the Unit ID.
Figure 12: View Traveler Mode
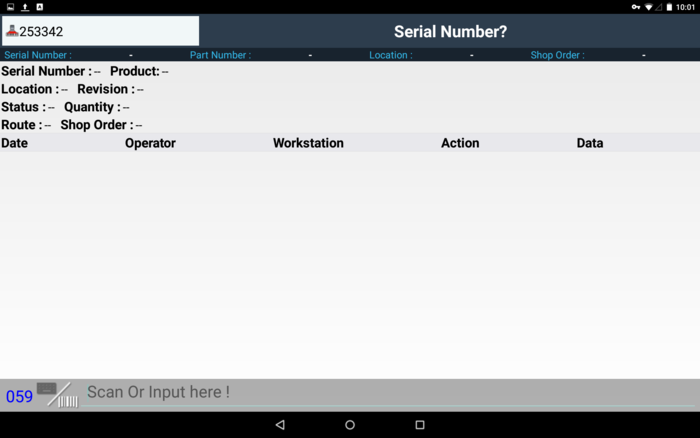
The next screen is going to ask users to enter the Work Order after login.
Figure 13: Enter Work Order
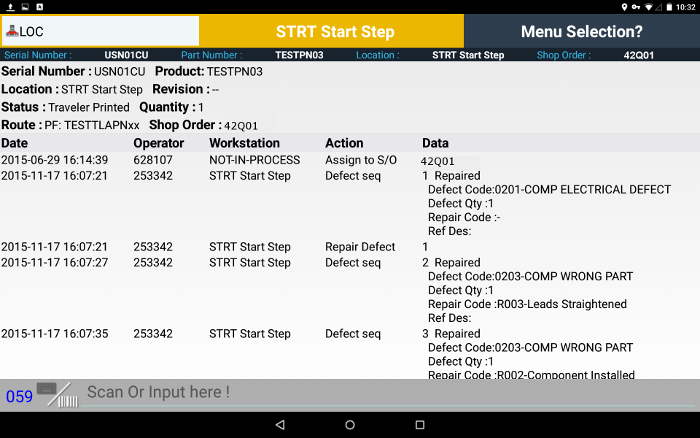
Enter the Work Order ,then click the Enter button, the detailed information will display, as the image below shows:
Figure 14: Detail information
Note: Add a button ESC to minimize or close the virtual keyboard. See Figure 15.
Figure 15: Add Esc button
Display Comment/Process Note/Attribute
There is an alert that let users know, if there is a Comment/Process Note/Attribute that has been entered on an operation/unit ID.
3 Icons are shown at the right side on the tablet:
- A icon for Attribute
- E icon for Engineer notes
- C icon for Comments
All the attributes of the current location display when clicking the A icon.
Figure 16: A For Attributes
All Engineer Notes display when clicking the E icon
Figure 17: E For Engineer Notes
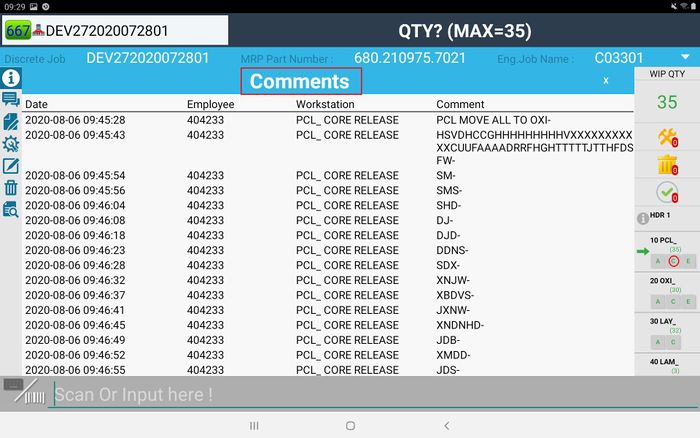
All comments display when clicking the C icon.
Figure 18: C For Comment
Document Revision History
| Date | Author | Title | Version | Change Reference | Approved By |
| 07/17/17 | Lucas Hopkins | Technical Writer | v 2.0 | This is the first version of Revision A2 | |
| 09/28/20 | Helena Wang | Technical Writer | V2.0 |
Add view traveler mode section, Add display A/E/C |
Cebrina Tu |

