How to create a Basic Route PN SN
Contents
How To: Create a Basic Route, PN, SN# and Scan SN#s
Basic Flow
This document outlines how to create a very basic route according to the following steps:
- Create Algorithm
- Create PNs
- Map PN to a Route
- Add Attribute (Optional)
- Create Shop Order (with PN)
- Release SNs (for Shop Order)
- Scan SNs
Prerequisites
All Devices, Locations, and Data Collectors are already configured.
Before you Begin
- Station ID has to be linked to the Location you plan to use. (Our Example: Location: p99dcval1)
- Check to make sure the Station ID you plan to use is Active.
- Activate or Add a Station ID here: Administration > SFDC Admin > Device Maintenance.
Screenshot: Activate or Add Station ID
- For this example, we are using VALIDATION as our Station ID.
Note: It's helpful to jot down the configurations on a post-it or notebook, as you will need to move between several portlets to get everything set up.
Create an Algorithm
- Go to: Shop Floor Control > Configuration > Algorithm Tool
- Select Create Algorithm
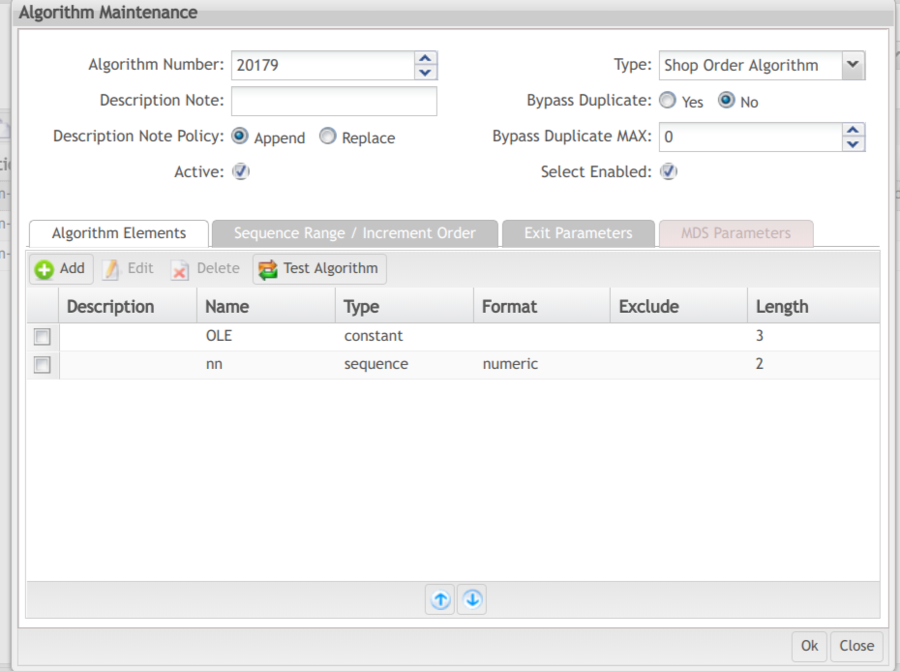
- The next available Algorithm Number is automatically displayed. Use the dropdown if you'd like a different one. (Our Example: 20179: You will need this number to create PNs)
- Select Type from dropdown. (Our Example: Shop Order Algorithm).
- Select Add.
- Select Element Type (Our Example: constant)
- Add Element Name (Our Example is OLE: This means that the name of each SN will begin with OLE)
- Select OK
- Select Element Type again to define the second part of your algorithm. (Our Example is: sequence.)
- Select Element Name. (Our Example is nn: This means that the sequence will contain 2 numbers together).
- Fill in the Minimum/Maximum Values. This sets the beginning and ending SNs that can be assigned. (Our Example: 01-99). You could choose 00-99; 11-22; 01-09; etc.
- Click OK.
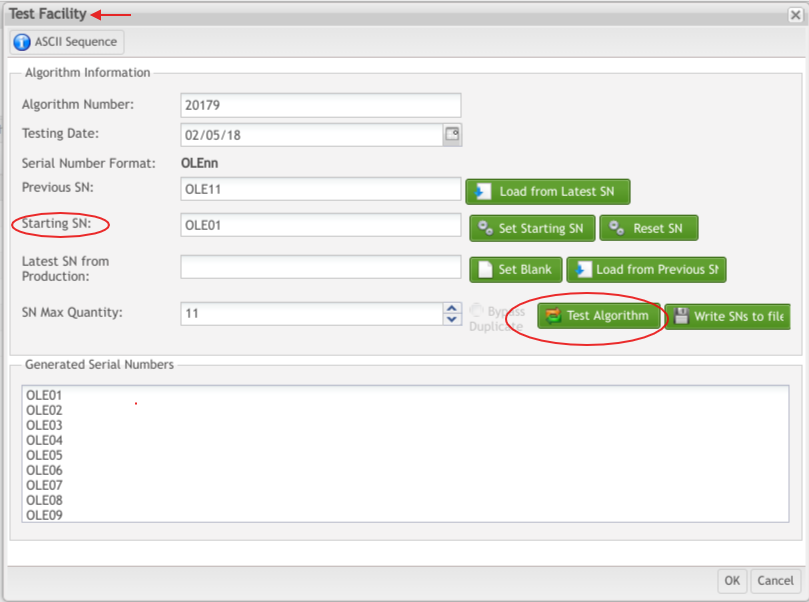
- Click Test Algorithm.
Test Algorithm
Screenshot: ''''TestAlgorithm
- Enter the Starting SN (Our Example: OLE01)
- Click Test Algorithm
- System generates a list of SNs.
- Click OK
- You MUST test the algorithm to assign the SNs as Active (next step).
- Tick Active.
- Tick Enabled.
- Click OK.
Screenshot: Create an Algorithm
Create Part Numbers (PNs)
SNs are linked to PNs. In order to release SNs, you must first create a PN. PNs are the foundation for traceability.
- Go to: Shop Floor Control > Configuration > SFDC Configuration > Part Number
Screenshot: Part Number Icon
- Add Part Number
- Complete the Mandatory Fields:
- Part #: Enter a PN. (Our Example: OLE001)
- Description: Enter a Description Title. (Our Example: Documentation)
- SN Algorithm: (Our Example: 20179)
- Serialized Item: Tick the Serialized Item box.
- Project ID: Pick from the drop-down list. (Our Example: Docs) Define your own (4 characters or less) by selecting the management icon next to Project ID:
Screenshot: Project ID Management Icon
Screenshot: Create PN (TOP of the FORM)
Screenshot: Create PN (BOTTOM of the FORM)
- Check it. (Type your PN in the filtering fields)
- There it is…..
Screenshot: PN Successfully Created
Map the PN to a Route
- Go to: Shop Floor Control > Configuration > Product Route
Screenshot: Product Route Icon
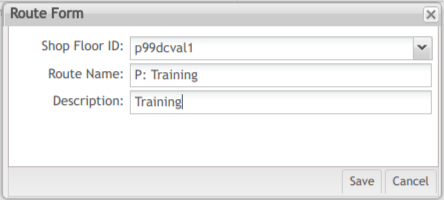
- Select Add
- Every field is mandatory.
- Best practice naming conventions are noted in<a href="https://docs.google.com/document/d/1C6in9ByMppv3K7F0JTN0s-enYuvx7BmuJXc0uaY-EQg/edit#heading=h.cvppgf2jes56"> this document.</a>
Screenshot: Route Name: Our Example
- Hit Save.
- The Route Step screen automatically displays.
Create Routes
Route Step 1
- To create the first step in your production route:
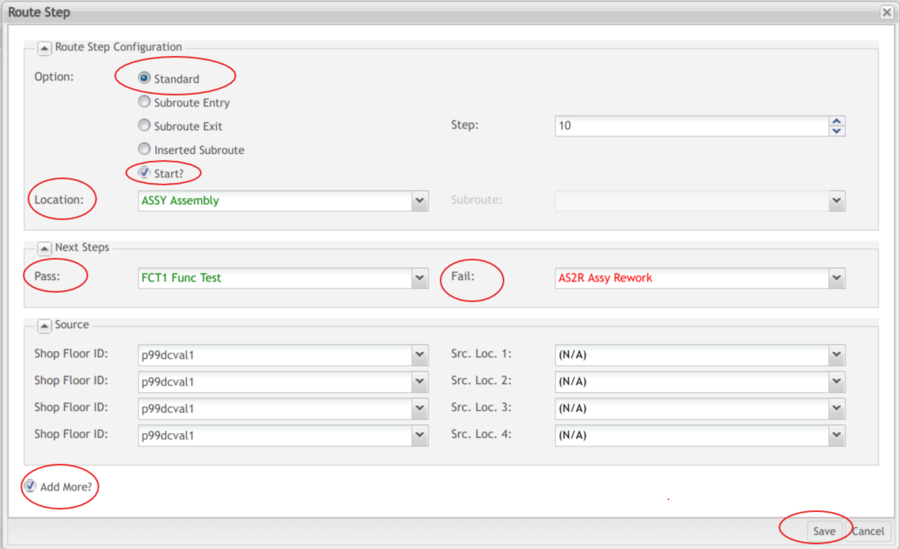
- Select the following:
- Tick Standard
- Check Start
- Location: Select the first step. (Our Example: ASSY Assembly)
- Pass: Select where you want your product to go next. "where you want your product to pass to…" (Our Example: FCT1 Func Test. We want our product to move to a test station after it is built.)
- Fail: Select where you want your product to go if it fails. (Our Example: AS2R AssyRework. We want our product to move to an Assembly Rework Station if it fails.)
- If the location route steps you want aren't in the drop-down list, go back to the main page in SFDC Configuration and configure them: Shop Floor Control > Configuration > Location
Screenshot: Location Icon
Screenshot: Route Step 1 (This is the Route Step Screen)
Create Route Step 2
Screenshot: Create Route Step 2
Create Route Step 3
Screenshot: Create Route Step 3
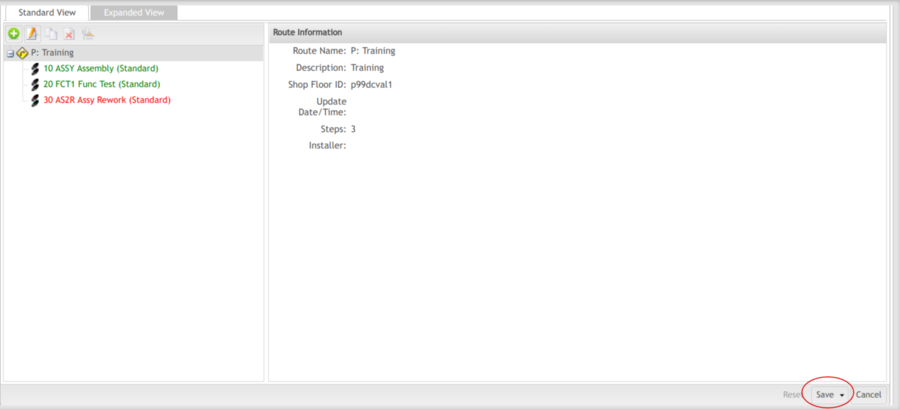
Screenshot: Route Steps Successful
Part X Route Assignment
Screenshot: Part x Route Assignment
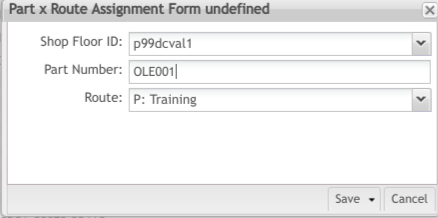
Screenshot: Add Part X Route Assignment: Our Example
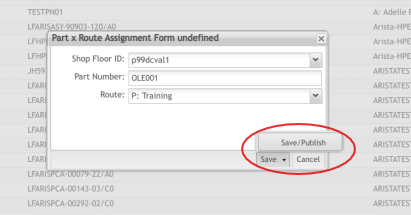
Screenshot: Save/Save & Publish
Add an Attribute
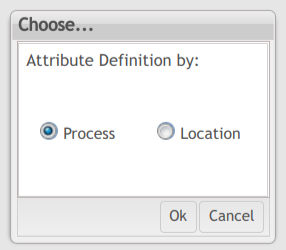
Screenshot: Process/Location
Screenshot: Attribute: Our Example
Screenshot: Step List
Screenshot: Attribute Step Form
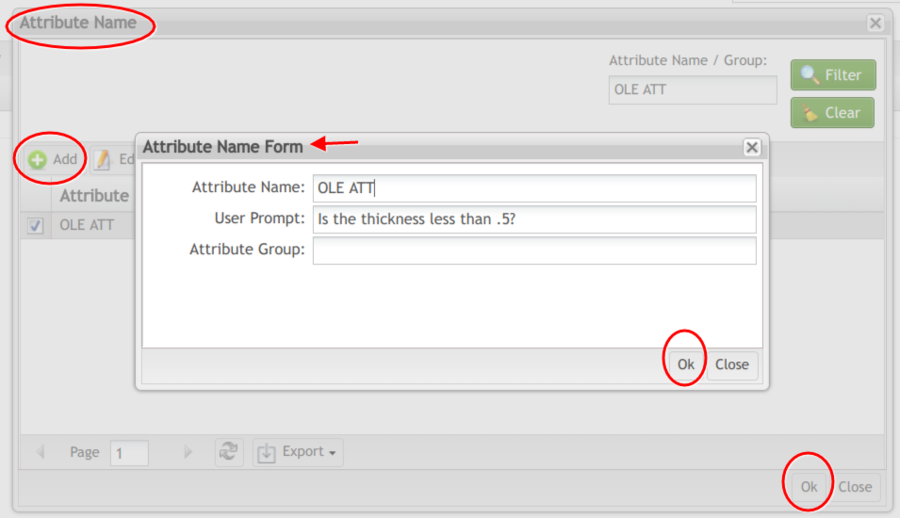
Screenshot: Attribute Name and Prompt
Note: It is best practice to use a specific Attribute Name - it becomes a reference designator for bang bang commands, which you may decide to use at a different time.
Screenshot: Complete Attribute Step Form
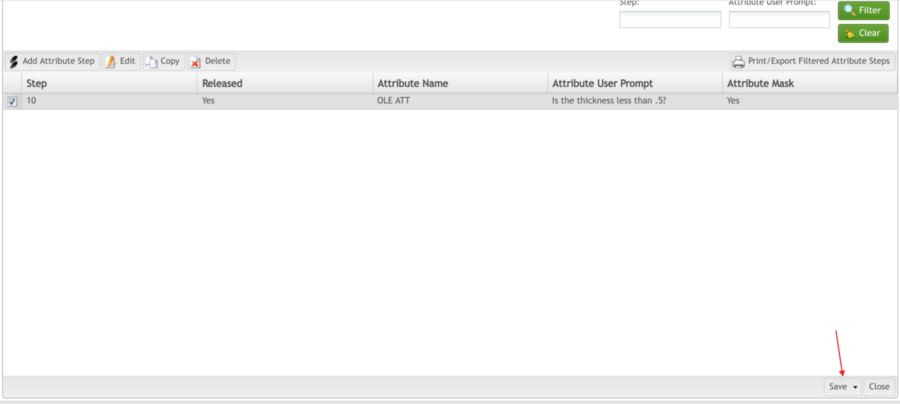
Screenshot: Save Attribute Again

