SOP-42Q-MDS0034 CMMS Work Request
42Q Home > Production > CMMS Work Request
This edition applies to 42Q and all subsequent releases and modifications until otherwise indicated in new revisions.
CMMS Work Request
A Work Request is a job order that is created to perform any equipment related tasks, which includes but is not limited to maintenance, repair, calibration and scrap. Work Requests are created for non-urgent incidents. Anyone who has a CMMS account may create a Work Request. Once a Work Request is created, it is sent for approval; once approved, an equivalent Work Order is created. Within CMMS Work Request, users can track the progress of all their work requests.
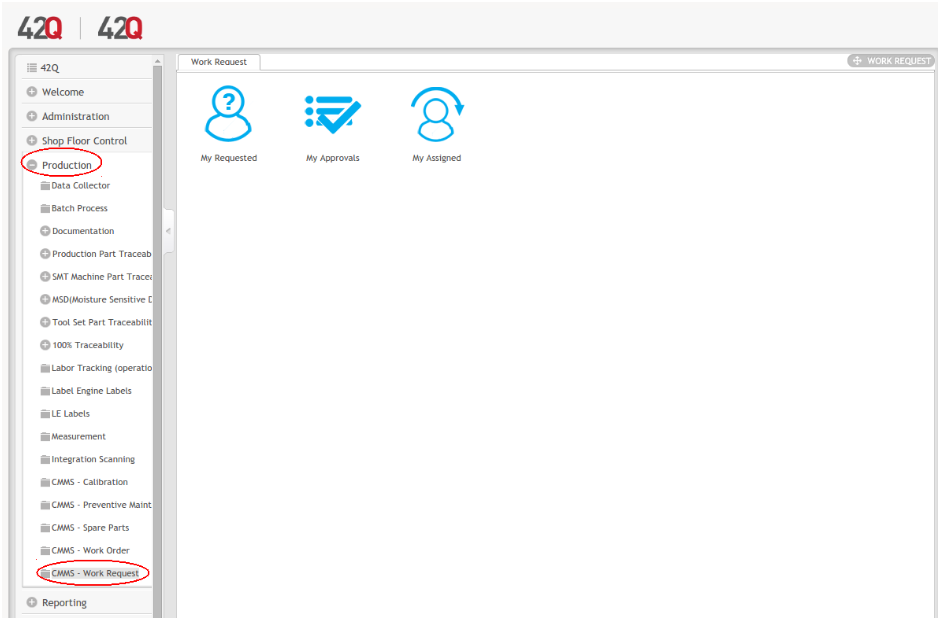
To access Work Request Maintenance, navigate to Production > CMMS > Work Request.
Figure 1: Work Request Main Page
There are three sub-modules located in the Work Request portal: My Requested, My Approvals, My Assigned:
- My Requested page lists all Work Requests submitted by the current user; the user can add or edit work requests.
- My Approvals page lists the WRs that need approval by the current user.
- My Assigned page lists the WRs assigned to the current user.
My Requested
All work requests that have been created by the current user in the local CMMS will be listed in the Work Request page. From the Work Request page, users can add a work request, edit a work request, and search/filter the work request list.
Adding/Creating a Work Request
- Select the My Requested icon on the main page.
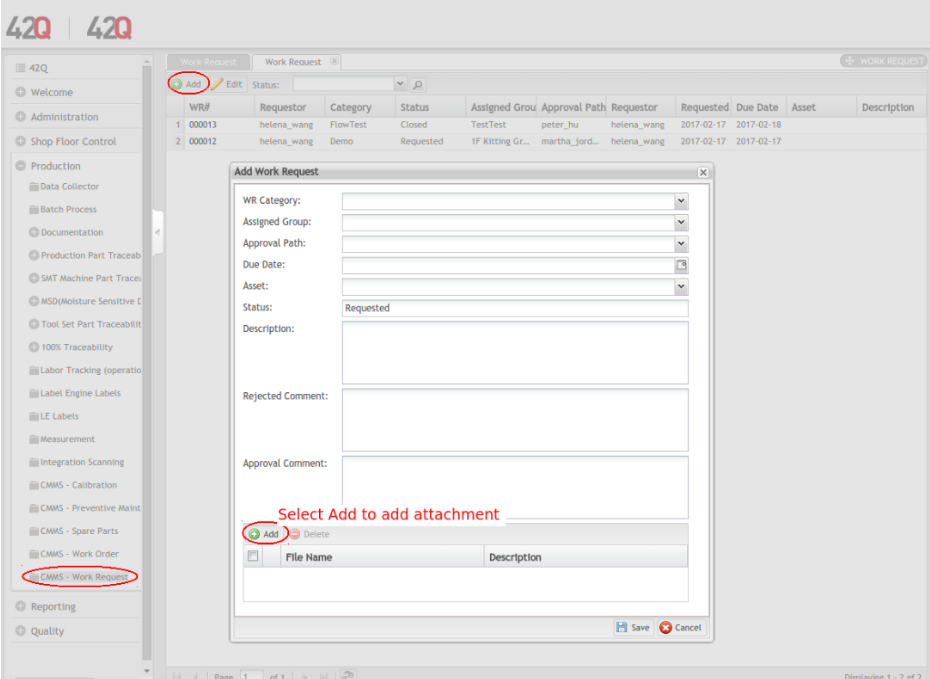
- Click the green Add button to create a new work request. (SeeFigure 2).
Figure 2: Add Work Request Page
3. To create a new work request:
- Fill in general information pertaining to the work request by completing all fields.
- Add attachments to the work request if necessary (See Figure 2, above).
- Click Save button to save the work request.
4. The following fields are included in the work request:
- WR Category: Select a category from the drop down list.
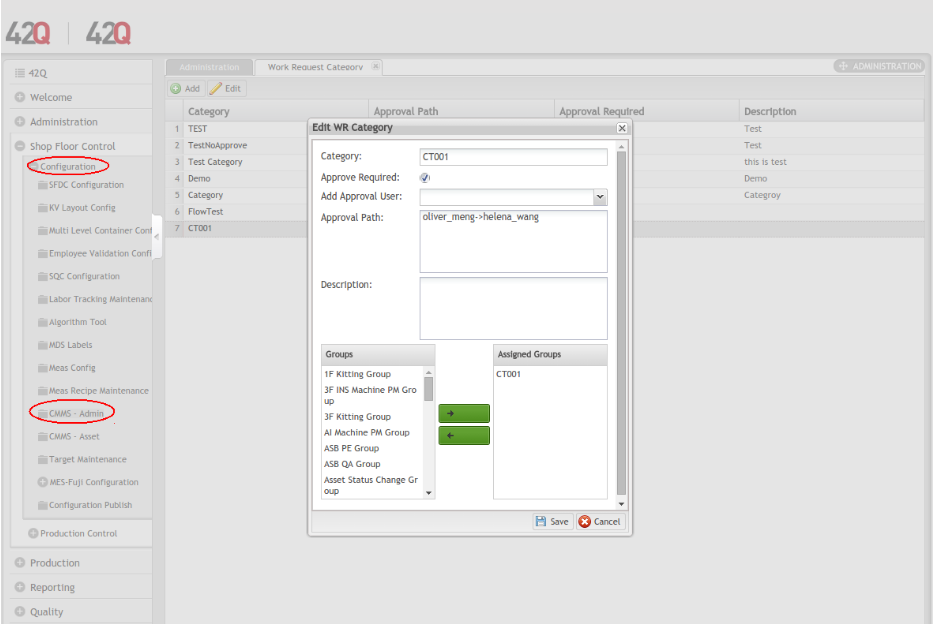
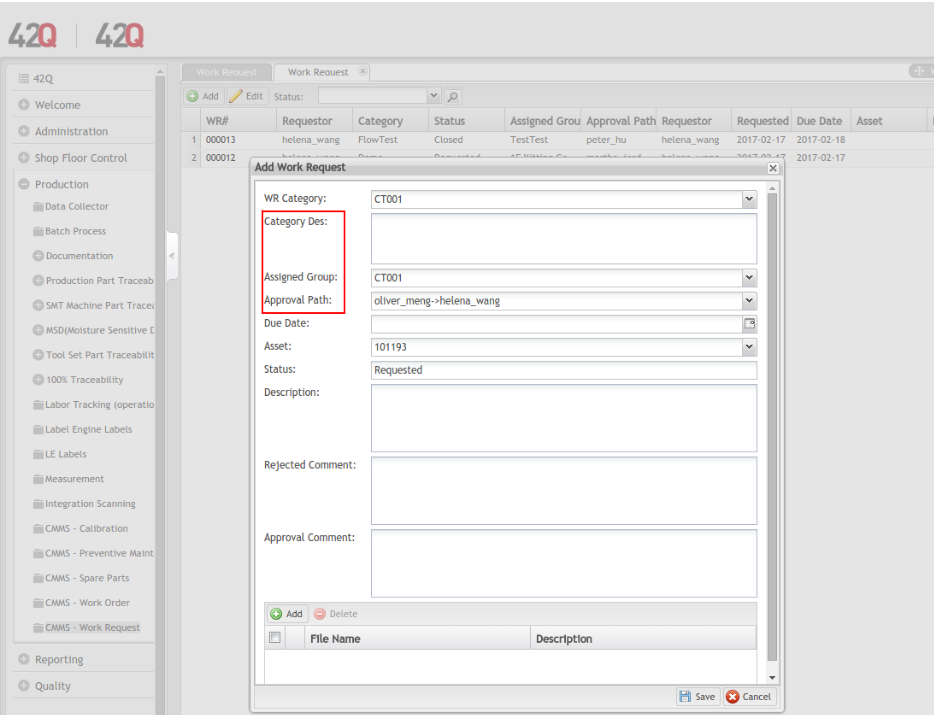
NOTE: Categories are predefined in the module: Shop Floor Control > CMMS Admin > WR Category. If the desired category is not available in the drop down list, the user should return to CMMS Admin to configure the information. Once the WR Category is selected, the following fields will populate automatically: Assigned Group, Approval Path, and Category Des. This is because those requirements were configured together with the Work Category at the beginning of the process, in the CMMS Admin portal. (See Figure 3 and Figure 4 for a visual explanation.)
- Category Des: The category description will automatically populate when the WR Category is chosen.
- Assigned Group: This field will automatically populate when the WR Category is chosen.
- Approval Path: This field will automatically populate when the WR Category is chosen.
- Due Date: Select the date the work request will expire. By default, the current date displays.
- Asset: Select the Asset in need of repair. By default, the first Asset in the list will populate.
- Status: Default is “Requested.” This field cannot be changed.
- Description: Provide a more thorough description of the issue that concerns the work request.
- Rejected Comment: Administrators can input the reason the work request was rejected in this field.
- Approval Comment: Administrators can input the reason the work request was approved in this field.
Figure 3: WR Category Configuration Example:
Figure 3: In the above example, the following have been assigned to WR Category CT001: Assigned Group: CT001; Approval Path: oliver_meng->helena_wang;Category Des: None.
In Figure 4 (below), the same information populates when the Work Request is created.
Figure 4: Create Work Order
5. Attachments can be added or deleted from the Attachment information.
6. To add an attachment to the new work request, click the Add button and a small window will appear. See Figure 5 (below):
Figure 5: Add New Attachments to Work Request
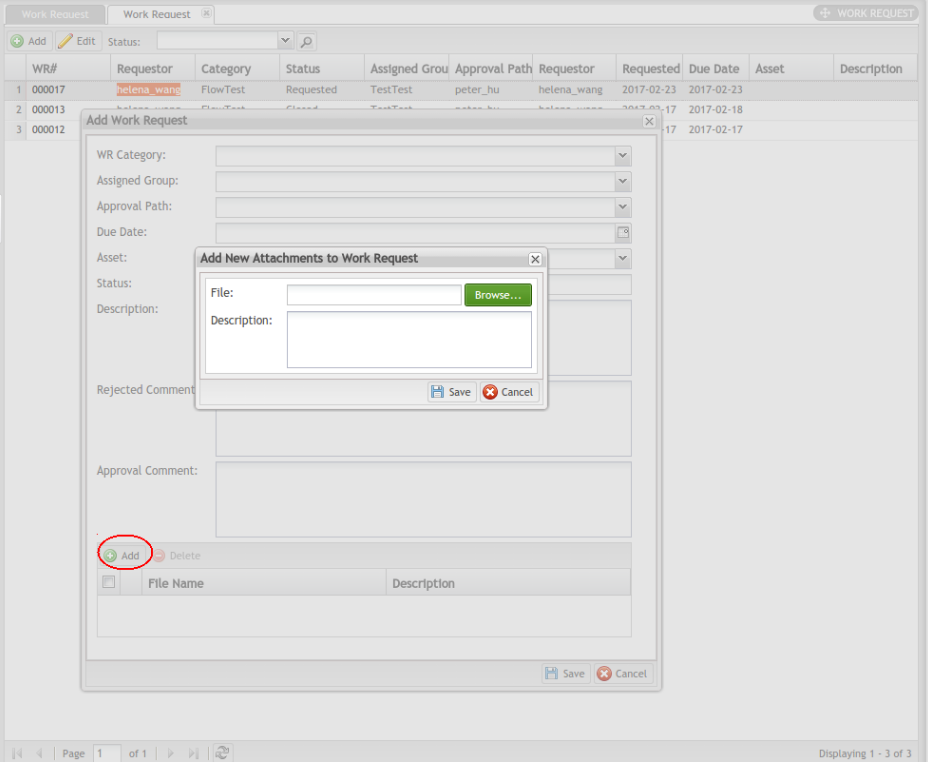
7. Click Browse to locate the file to attach.
8. Enter more information about the file in the Description textbox if necessary.
9. Save the attachment to the local system and the uploaded file will be displayed .
NOTE: In the event an incorrect attachment is uploaded, users can Delete the document from the Attachment list and upload the correct one(s).
10. To delete an attachment:
- From the Attachment list, select an attachment from the list.
- Select Delete. The selected attachment is removed from the list.
11. Once the Work Request is saved, the item moves to request status and the system automatically sends an email to the following persons: (See Figure 6)
- Requester
- Approver
- Approver’s Supervisor
NOTE: If the Approval Path has more than one Approver, just the first Approver and his/her Supervisor receive the requested e-mail at this step.

