SOP-MES0029 Admin Document Control
This edition applies to MES15 Portal 1.0 and all subsequent releases and modifications until otherwise indicated in new revisions.
Administration
Administrative privileges for the Cirrus portal are located in the Administration menu heading. With the portal, Administrators are able to access privileges from one convenient location. Privileges include User Maintenance, Plant Maintenance, Site Maintenance, Profile Maintenance, and Generic Attribute Maintenance. Also located in the Administration menu heading are SFDC Administrator, Document Control, PTS Administrator, and LE Administration.
This work instruction is intended to guide administrators on how to manage and maintain the Cirrus Portal, as well as to provide specific user groups a common sense of portal operation.
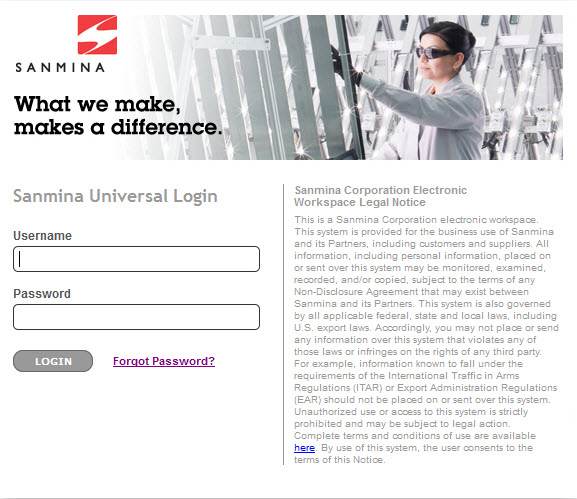
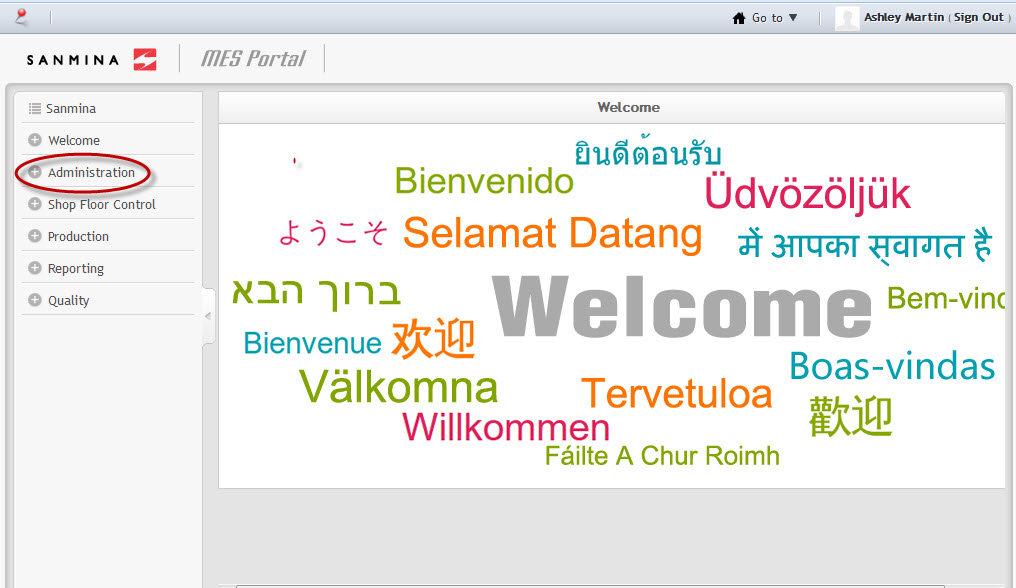
To access any of the Administration functionalities, the user must sign into the Cirrus Portal and then select the Administration expandable heading located in the menu on the left of the screen.
Figure 1: User Sign-In
Figure 2: Cirrus Welcome
Document Control
This section covers how local administrators can maintain document file types. This is the prerequisite configuration before users can upload any documents, as all uploaded documents will be categorized and displayed by its document type.
Document Type
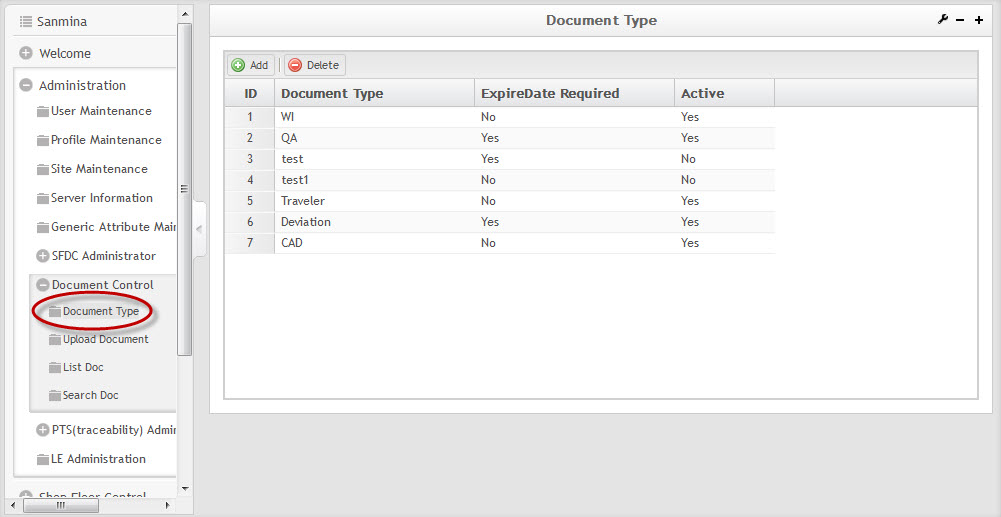
1. To access the document type page, navigate to Administration > Document Control > Document Type.
Figure 3: Document Type Main Page
All existing document types will be listed on the Document Type Main Page.
Add Document Type
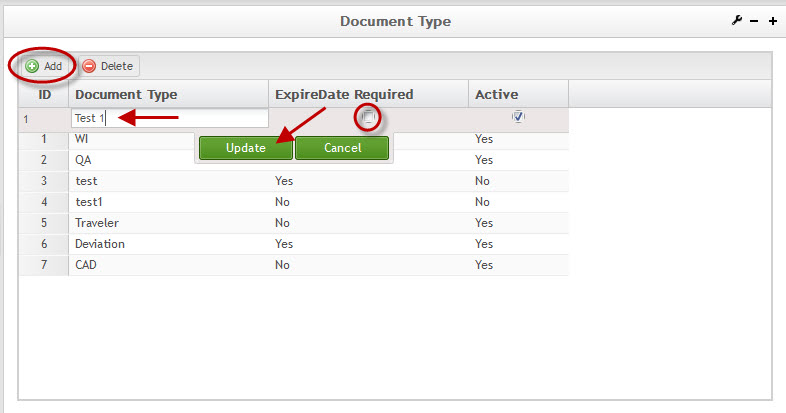
1. To add a new document type, select the Add button, and a new row will be added.
Figure 4: Add Document
- Document Type: the document type name that you want to add into eManual.
- ExpireDate Required: Allows user to define if there is a valid date required for the document type. If this option is checked, the Start Date and End Date options in Upload Agile/Local Document page will be activated.
- Active: Allows user to enable or disable the document type in eManual system. If this option is checked, the user can view and select the document type when uploading documents.
2. Enter the appropriate information and select Update to confirm or Cancel to exit.
Delete Document Type
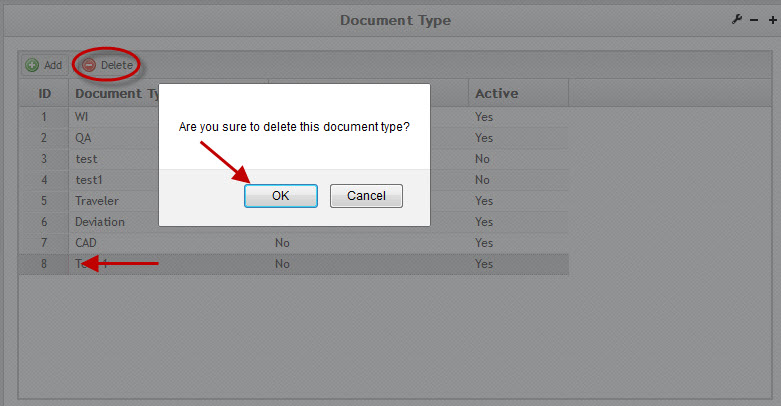
1. To delete a new document type, select the document type and then select Delete. Deleting a document type won’t affect the display of existing documents that are of this document type in eManual.
Figure 5: Delete Document Type
Upload Document
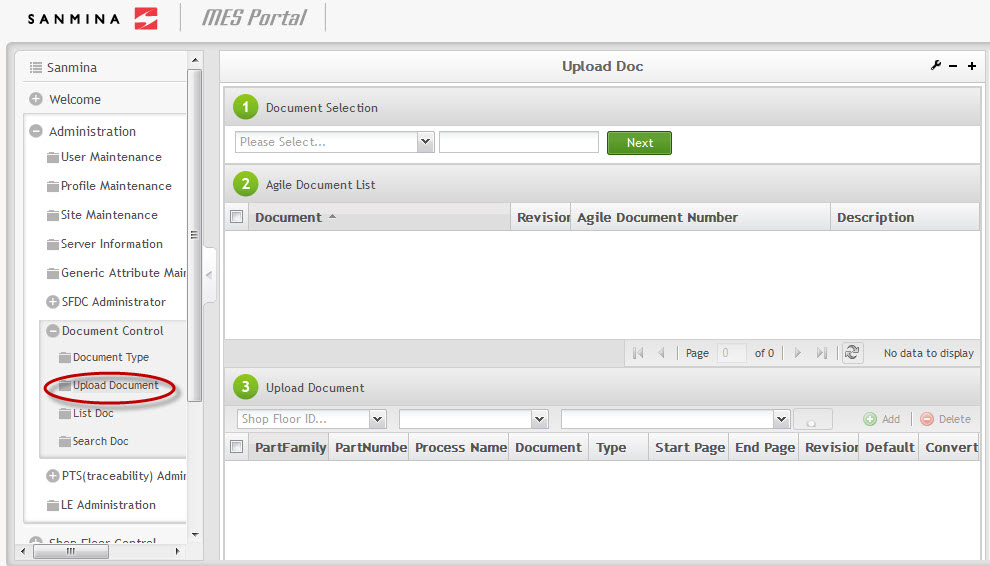
1. To access the Upload Document page, navigate to Administration > Document Control > Upload Document.
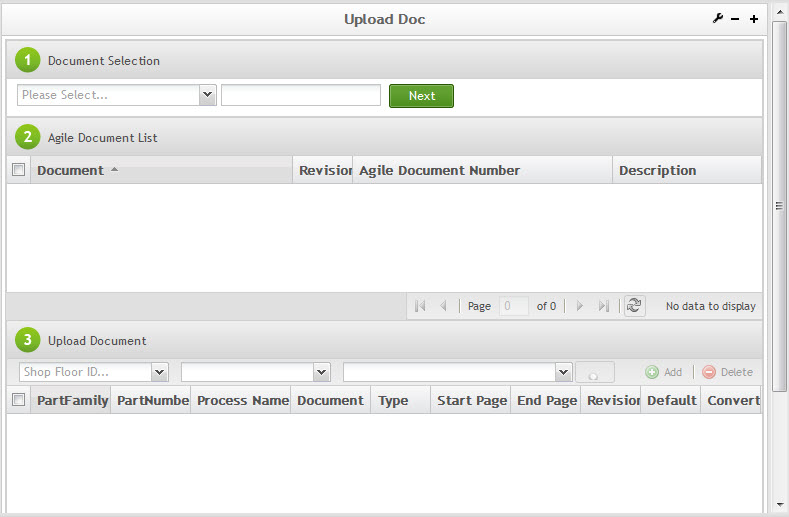
Figure 6: Upload Document
The Uploading Document page and portlets allow users to maintain their documentation by uploading documents via Agile, local networks, or URLs and assigning them to certain part numbers and part families. To avoid needless repetition, this will note only once that the goal of these instructions is to assign appropriate documentation to the end user regarding some process and part for which they require work instructions. The directions given below provide the set-by-step process for selecting and assigning documentation by means of the various portlets provided:
Document Selection: Agile Versus Local
Selecting the Agile portlets allows documents to be uploaded from Agile. The benefit of uploading documents from Agile in general is that Agile documents are published in full compliance with company standards and procedures. Retrieving a document from Agile ensures that the document is the latest version of the given work instruction. However, users can upload documents from their local computer and network by selecting from the local portlets.
Uploading from Agile
Users can select to upload documents from Agile by using a document’s assigned Agile Document Number, Part Number, or Deviation Number. Regardless of the choice, the process is virtually the same:
1. Under Document Selection, click the dropdown box and select whether to search by Agile Doc Number, Agile Part Number, or Agile Deviation Number.
2. Enter the corresponding (Agile) document number, part number, or deviation number in the adjacent search field and select Next.
3. Select the appropriate document from the Agile Document List.
4. Now, select the (shop floor) part number or part family to which to upload the document under Upload Document: select the Shop Floor ID from the dropdown box on the left; select whether you are uploading the Agile document to a part number or part family from the middle dropdown box; in the dropdown box on the right, select a part number or part family.
5. Select Search and select the appropriate item from the search results.
6. Select Add.
7. In the pop-up window provided, select Process, Document Type, Start Date (if applicable), End Date (if applicable), Convert to, Start Page, End Page, and Show Default to apply to the document.
8. Select Save. This uploads the document according to the properties selected.
Note: When uploading a deviation document, the Documentation Type selected must be Devation.
Figure 7: Document Selection
Uploading from Local Computer or Network
Users can select to upload documents from a local computer or network by document or deviation number. Regardless of the choice, the process is virtually the same:
1. Under Document Selection, click the dropdown box and select whether to search by Local Document or Local Deviation Number.
2. Enter the corresponding local deviation (if applicable).
3. Now, select the path by which to upload the document under Upload Document: select the Shop Floor ID from the dropdown box on the left; select whether you are uploading the document to a part number or part family in the middle dropdown box; in the dropdown box on the right, select a part number or part family.
4. Select Search and then select the appropriate item from the search results.
5. Select Add.
6. In the pop-up window provided, select the File, Process, Document Type, Start Date (if applicable),End Date (if applicable), Convert to, Start Page,End Page, and Show Default to apply to the document.
7. Select Save. This uploads the document according to the properties just selected.
NOTE: When uploading a deviation document, the Documentation Type selected must be Deviation.
By URL
A user may upload a document from a URL:
1. Under Document Selection, click the dropdown box and select whether to search by URL.
2. Enter the corresponding URL path for the PDF document being uploaded, and click Check Validation.
3. Now, select the path by which to upload the document under Upload Document: select the Shop Floor ID from the dropdown box on the left; select whether you are uploading the document to a part number or part family in the middle dropdown box; in the dropdown box on the right, select a part number or part family.
4. Select Search and then select the appropriate item from the search results.
5. Select Add.
6. In the pop-up window provided, select the File, Process, Document Type, Start Date (if applicable), End Date (if applicable), Convert to, Start Page, End Page, and Show Default to apply to the document.
7. Select Save. This uploads the URL according to the properties selected.
List Document
This section explains how a user can review all work instruction documents in eManual document repository and search work instruction documents by filtering using part number and/or process name. When user access List Document page, eManual will display a list of work instruction documents uploaded via Upload Agile Document/Upload Local Document, order by Created Date.
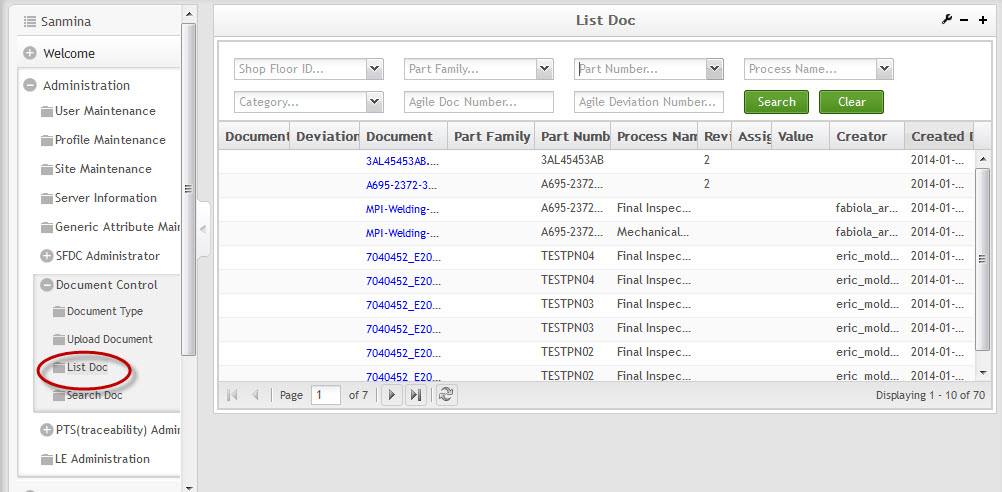
1. To access the List Document page, navigate to Administration > Document Control > List Doc.
Figure 8: List Doc
Prerequisite Configuration
- Upload Agile Document / Deviation or Upload Local Document / Deviation
Below are features of the List Document page:
- List out all work instruction documents in eManual document repository.
- Search capability. Allow user to input SFDC part number and/or process name. System will return a list of documents with associated SFDC part number and/or process name.
- Allow user to view work instruction document PDF attachments.
- Part Family (optional): Input SFDC Part Family. Fuzzy Search is supported.
- Part Number (optional): Input SFDC Part Number. Fuzzy Search is supported.
- Process Name (optional): Input SFDC process name. Fuzzy Search is supported.
- Search: Search documents in eManual document repository based on Part Family and/or Part Number and/or Process Name.
- Category: All, Agile Doc, Deviation Doc, Local Doc, URL Doc can be selected and fuzzy search is supported.
- Clear: Clear Part Family, Part Number and Process Name field and all other input information.
- Agile Doc Number: All documents uploaded from Agile system have corresponding Agile document numbers listed out in this column. For work instruction documents uploaded using Upload Local Document, this column will be left empty. This is how user can differentiate between work instruction documents uploaded from Agile system or non Agile system.
- Agile deviation number: Deviation number from Agile. Fuzzy search is supported.
- Document: Uploaded PDF attachments name. Single-click on the file name to view the content.
- Revision: Current revision number of the agile document number uploaded in eManual document repository. For work instruction documents uploaded using Upload Local Document, this column will be left empty. This is how user can differentiate between work instruction documents uploaded from Agile system or non Agile system.
- Part Family: SFDC part family that has been pre-mapped with the PDF attachment. This column matches with the above Part family field entered by user if there’s any.
- Part Number: SFDC part number that has been pre-mapped with the PDF attachment. This column matches with the above Part Number field entered by user if there’s any.
- Process Name: SFDC process which has been pre-mapped with the PDF attachment. This column matches with the above Process Name field entered by user if there’s any.
- Creator: Indicate the user that uploaded the work instruction documents.
- Created Date: It refers to the date of uploading the work instruction documents.
- Navigation controls: Down on the left side of the window, there’s a group of controls to ease your navigation:
- File:SOP-5-I-MES150028-C RA1 Document Control button01.jpg: Back to the first page.
 : Go to the last page.
- File:SOP-5-I-MES150028-C RA1 Document Control C.jpg: Back to previous page.
- File:SOP-5-I-MES150028-C RA1 Document Control D.jpg: Go to next page.
- File:SOP-5-I-MES150028-C RA1 Document Control E.jpg: Reload document list.
A more efficient way to reach a page is to enter the page number in the page field and select Enter.
Search Doc
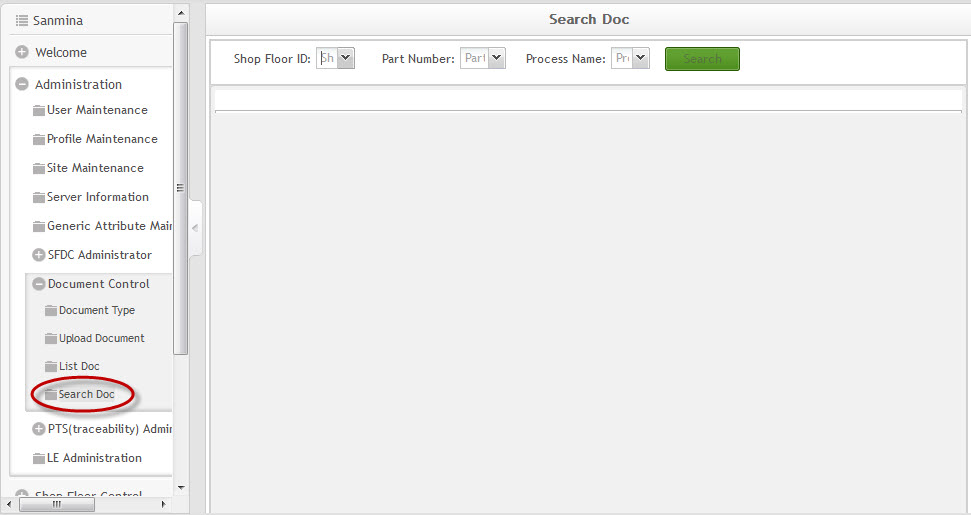
1. To access the Search Doc page, navigate to Administration > Document Control > Search Doc.
Figure 9: Search Doc
2. Select a Shop Floor ID, Part Number, and Process Name, and then select Search.
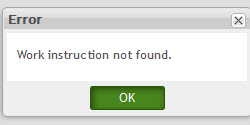
NOTE: If the Shop Floor ID, Part Number, or Process Name is incorrect the following error will display:
Figure 10: Error Message
Document Revision History
| Date | Author | Title | Version | Change Reference |
| 02/17/14 | Ashley Martin | Technical Writer | v 1.0 | This is the first revision of Generic Attribute User Guide. |
| 02/24/14 | Elaine Fonaro | Technical Writer | v 1.0 | Formatting for WIKI |

