Configuration
Contents
SFDC Configuration
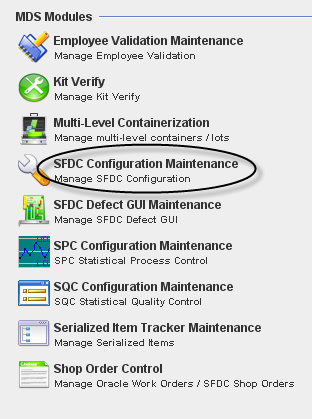
1. To access the SFDC Configuration module, click on SFDC Configuration in the main MDS Modules window.
Figure 1: MDS Client Modules – SFDC Configuration Maintenance
GENERAL NOTES: a)A user only has access to the modules assigned to his/her profile. Profile permissions are granted in the MDS PRAC (Program Access Control) Module by the Program Admin user.
b)Any/all reports printed from jMDS modules will print to the default printer for the workstation.
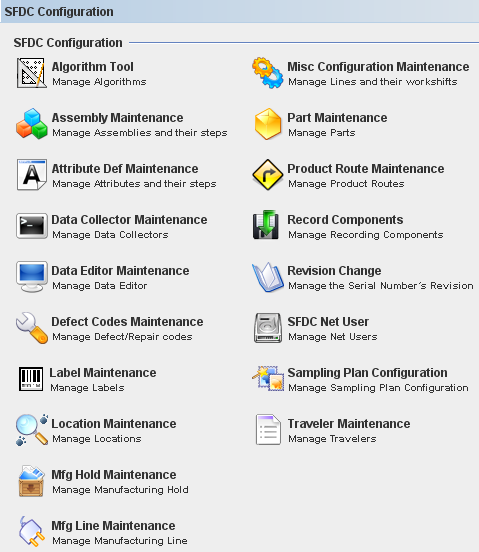
2. The SFDC Configuration main window is displayed.
Figure 2: SFDC Configuration Modules
This is the main SFDC Configuration Module window.
Kit Verify Configuration
The Kit Verify consolidates or validates all of component that we have in a “Kit” that warehouse give to the floor versus the shop order, in order to know if we have missing component in the Kit.
This module is integrated to MDS Client Application and will be available to all Sanmina's Plants.
Layout Configuration
The function of this interface is to allow the user to Add, Copy or Edit an assembly layout in the Kit Verify MDS Database.
Note 1: If Oracle does not send the reference Designator information to MDS the system will allow entering it manually.
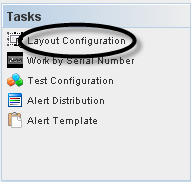
To access the Layout functionality, click on Layout Configuration at Tasks panel.
Figure 4: Choose Layout Configuration
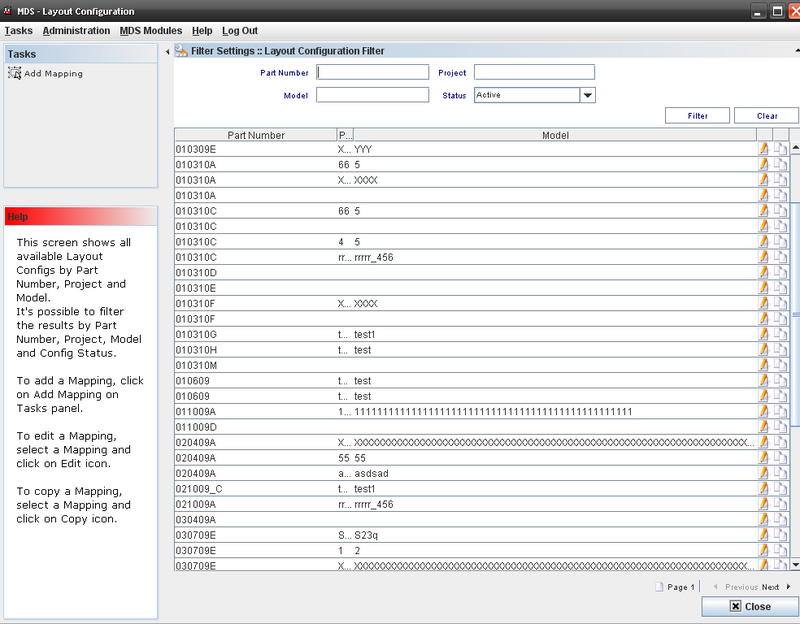
The Layout main window displays:
Figure 5: Layout Configuration Main Window
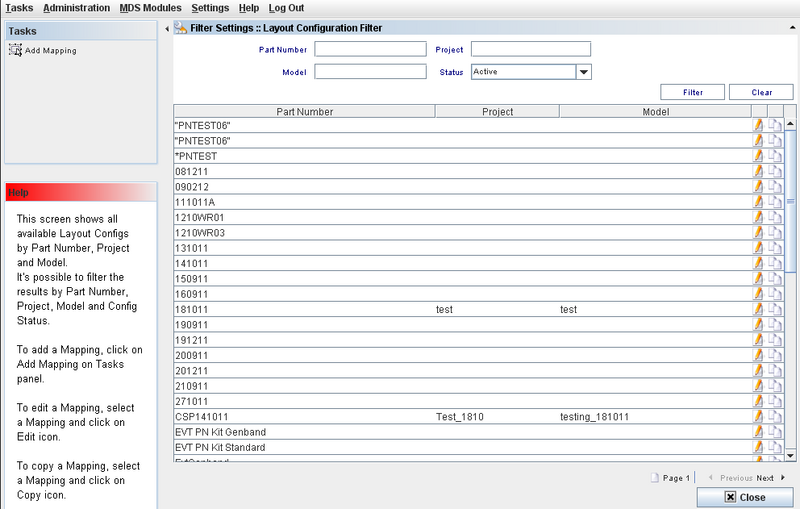
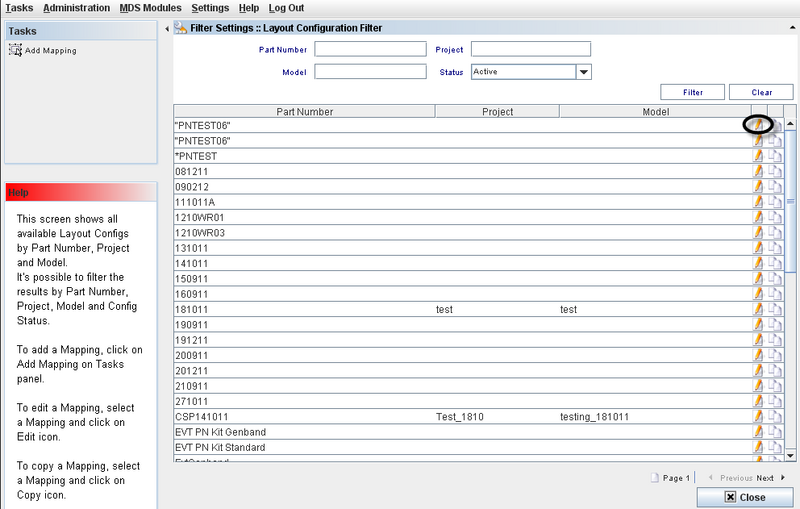
This screen will display all available Layout Configurations by Part Number, Project and Model.
Layout Configuration List
This screen displays all Layouts available and the user can edit or use the copy function.
Figure 6: Layout Configuration Filter
Adding a Mapping (Layout configuration)
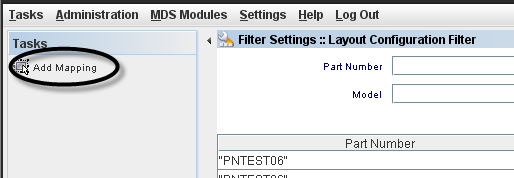
To create a Control Config, the user must to click onCreate Control Config on Tasks panel.
Figure 7: Add Mapping from Tasks panel
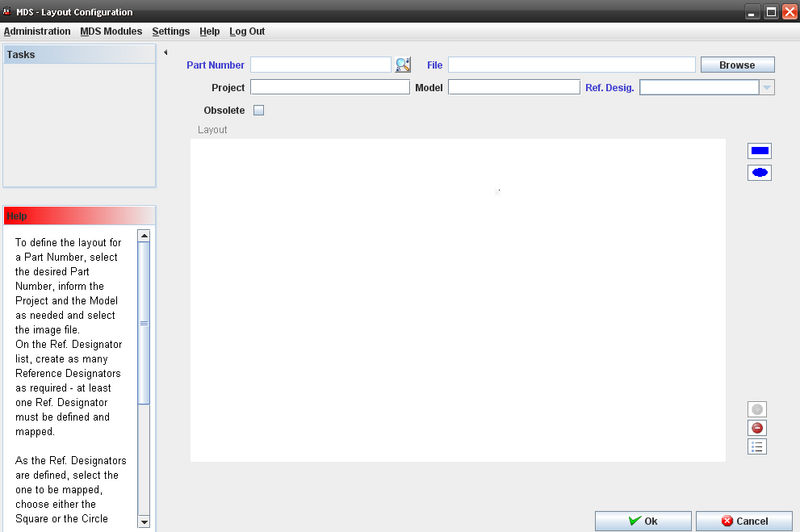
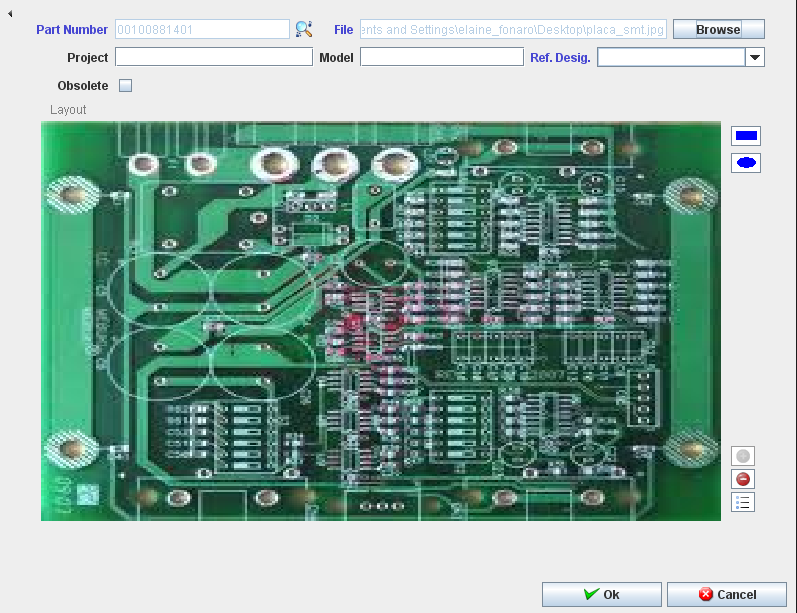
The Layout Configuration screen displays:
Figure 8: Layout Configuration screen
Note1: at least one Ref. Designator must be defined and mapped.
Fields that User can enter/select:
- Part Number;
- File
- Project;
- Model;
- Reference Designator;
- Browse to find the layout file;
Follow the steps below to define a layout for a part number:
- Select the desired Part Number; inform the Project and the Model as needed.
- Click on the “Browse” button to select the new assembly layout. The system will show the File Dialog window and the user can select the image. The system disables the button and the path text box and the image will appear in the layout box;
- On the Ref. Designator list, the user must to create as many Reference Designators as required which will then automatically appear as disabled;
- The user has to click in Square orCircle form Button and draw a Square or Rectangle in Layout;
- Click on the Add “+” button.
- At the same time a new row with the reference designator information will appear in the “UI control” box with the following variables:
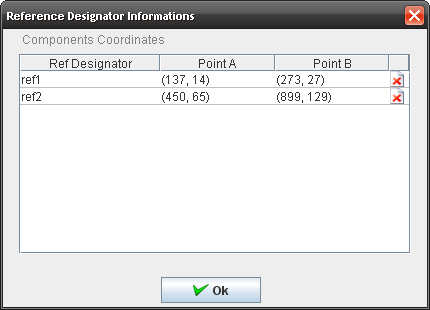
Figure 9: Components Designator
To view the Reference Designator Information, click on the View button in the Layout Configuration window.
a.X coordinate;
b.Y coordinate;
c.Width;
d.Height;
- To delete the component, click on Delete icon.
- After adding all reference designators the user has to click on the “OK” button and the system will insert all these rows into the MDS Database;
Editing a Layout Configuration
Figure 10: Edit Layout configuration
To edit a Mapping, the user must to select a Mapping and click on Edit icon.
The Layout Configuration window displays with the existing layout information.
Figure 11: Layout Configuration
Note that the following fields can not be updated:
- Part Number
- Layout
- Project
- Model.
The Ref Designator can be removed from the list or included in the list.
To obsolete a configuration, check the Obsolete box.
Copying a Layout Configuration (mapping)
This option allows the user to create a new layout based on a pre existing layout (this module allows the user to copy and modify an existing assembly layout).
Follow the steps bellow to copy a layout:
- The user must create a new relation between the project and the model;
- Select the layout in the list and click the “Copy” button;
- The image will appear in the layout box, and all records will appear in the “UI control” grid;
- Select the part number that will have the layout chosen;
- In case the user wants to change any reference designator he/she has to select it on the assembly layout and the reference designator row that was selected will appear in the “UI control” grid.;
- Once the modification has been finished, the user has to click onOK button;
The system updates the information into the MDS database.
