Difference between revisions of "SOP-42Q-MES0071 Employee Validation Maintenance"
Dane parker (talk | contribs) |
Dane parker (talk | contribs) |
||
| Line 139: | Line 139: | ||
<br> | <br> | ||
| − | + | 2. Select the trainer, the certificate and the date for training from the drop down list. Selecting the certificate, the Grace Period and Training Expiration Date will be automatically filled. | |
| − | + | 3. Go to Employees maintenance and add the employees who have taken the class, by clicking on the '''Add Employee''' button. | |
'''NOTE''': The class must have at least one associated certificate. | '''NOTE''': The class must have at least one associated certificate. | ||
| Line 169: | Line 169: | ||
'''NOTE''': The add Employees by group is a way to make adding employees fast and EV does not store group information, i.e. if the selected group has a new employee added in the future, he/she won<nowiki>’</nowiki>t be added to the class. | '''NOTE''': The add Employees by group is a way to make adding employees fast and EV does not store group information, i.e. if the selected group has a new employee added in the future, he/she won<nowiki>’</nowiki>t be added to the class. | ||
| − | <br> | + | <br> |
=== Editing Classes === | === Editing Classes === | ||
Revision as of 19:14, 30 January 2014
Certificate Maintenance
The next step to configuring Employee Validation is to create certificates. To access the Certificate Maintenance, navigate to Quality > Employee Validation > Certificate Maintenance.
The main certificate maintenance page is displayed.
Certificate List
The image above shows the Certificate Maintenance page. (Note that certificates are denoted by the ![]() icon. Underneath certificates are the process/process assigned to them, denoted by the
icon. Underneath certificates are the process/process assigned to them, denoted by the ![]() and
and ![]() icons. Gold stars represents the last update. Silver starts represent old instances that are associated with classes already created.)
icons. Gold stars represents the last update. Silver starts represent old instances that are associated with classes already created.)
Adding Certificates
To add certificates and assign processes and process groups or part/family to Certificates, click Add Certificate.
The Certificate Maintenance screen displays:
Complete the fields:
- Certificate Name: The name of the new certificate (required)
- Pilgrim Role: this field is used to associate the Certificate to a Pilgrim role. It was created to maintain a list of the ’Roles’ in Pilgrim that require training for EV purposes, linked to the EV certificate associated with that role.
- Life Span: Number of days the certificate is valid (required)
- Grace Period: Number of days allowed after expiration (cannot be grater than 30)
- Click Ok to confirm. The new certificate must display in the Certificate list.
- Click the Add Process / Process Group button to define the process (es) and/or groups that are associated to the certificate.
Adding Process/Process Group to a certificate:
Adding (or assigning) a process or group to a certificate is a necessary, as a certificate cannot be created without having at least one process or process group assigned to it. To add a process group,
- From the Process/Process Group tab, click Add Process Group.
- In the Process Group popup window, check the appropriate boxes and click OK.
- The inserted process/process group is displayed in the Process Group tab.
To add a Process,
- From the Process/Process Group tab, click on Add Process.
- Check the box of the process to assign to the certificate, and click OK.
Creating generic certificates:
If multi-pass device numbers are used in SFDC, then it is recommended to create a generic certificate and assign some process to it. The process does not have to exist in any route. An example would be SFDC Training for the process. The process is not used for any locations or in any route. The process is controlled by Employee Validation and a generic certificate is created for this process.
All employee numbers are associated to this certificate/process. The reason for this is to allow any employee to log into a device number that has one or more EV controlled processes. Without a generic certificate/process, employees would not be able to log into the device number to perform the non-EV controlled processes that are assigned to the multi-pass device number. Employee validation insures that serial numbers that are at a controlled process can only be scanned by employees that have the necessary certification for the controlled process. Without the generic certificate/process, non certified employees will not be able to log into multi-pass device numbers.
To Remove Certificate Process/Process Group:
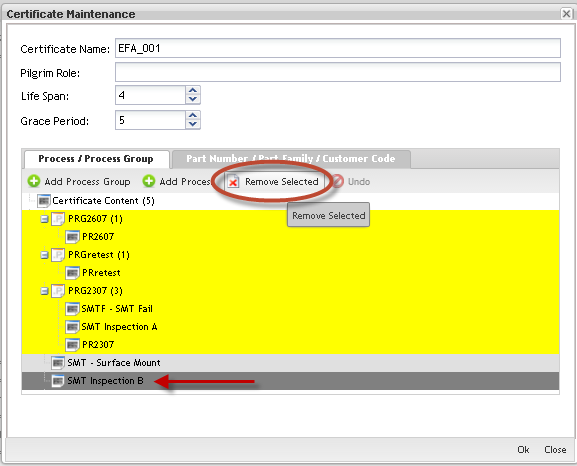
Click the process/process group to select it and click on Remove Selected button. The removed process/process group displays in dark gray in the list. To undo, select it again from list and click Undo.
Adding Part Number/Part Family/Customer Code to the certificates:
 In addition, users can add Part Numbers/Family and Customer Codes to the Certificate. The rules to add, remove and undo remove are the same described for Process and Process Group.
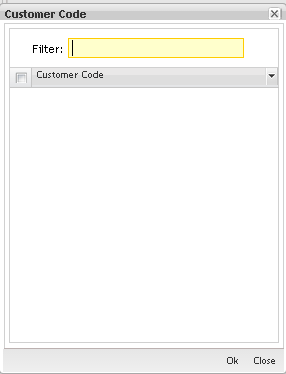
To add customer code, select the item (s) in the list and click on OK.
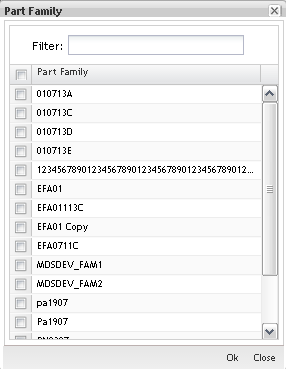
To add part numbers/family, select the item (s) in the list and click on OK.
Editing Certificates
To Edit Certificates, select the certificate in the Certificate List and follow the same instructions to Add Certificates: update the mandatory fields and click on OK to commit the change.
NOTE: Every time the user adds a new Process on the Certificate, the application creates a new instance of that Certificate. All classes created before the Certificate changes will be linked to the old Certificate instance.
Consider the following example:
1- Create Certificate CERT with process "A" and "B";
2- Create a Class for CERT with employee Thomas and Keith;
3- Edit CERT and add the new Process "C";
On this example the employees Thomas and Keith will be trained only on the processes "A" and "B". If the certificate is changed, they need to be trained on "C", therefore another class will need to be created for the same CERT.
Removing Certificates
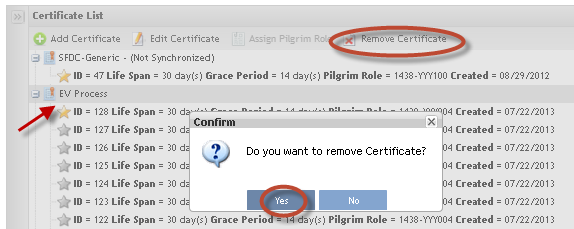
To Remove Certificates from the list, follow the steps below:
1. Select the certificate to be removed;
2. Click on Remove Certificate button. A popup message displays to confirm the certificate removal.
3. Click on Yes to confirm or click on No to cancel.
NOTE: Certificates already associated with classes can not be removed.
Class Maintenance
To access the Class Maintenance page, navigate to Quality > Employee Validation > Class Maintenance. The user is able to add, copy, or edit classes and perform searches from the main class page.
Adding Classes
1. Click on Add Class in the Menu bar. The Class Maintenance page displays:
2. Select the trainer, the certificate and the date for training from the drop down list. Selecting the certificate, the Grace Period and Training Expiration Date will be automatically filled.
3. Go to Employees maintenance and add the employees who have taken the class, by clicking on the Add Employee button.
NOTE: The class must have at least one associated certificate.
1. Add the Employees clicking on Add Employee. The Find Employees popup displays to find Employees.
2. Select the Employee (s) and click on OK to commit the inclusion. To add employee groups:
1. Click on Add Group.
The Find Groups popup displays to find Groups.
2. Select the Group (s) and click on OK to commit the inclusion.
Both, groups or employees are displayed in the Employees list.
NOTE: The add Employees by group is a way to make adding employees fast and EV does not store group information, i.e. if the selected group has a new employee added in the future, he/she won’t be added to the class.
Editing Classes
To Edit Classes, select the class to be edited and click on Edit icon. Follow the same steps performed to add classes. Click on Ok button to commit the changes.
NOTE: Classes cannot be deleted.
Employee Maintenance
To access Employee Maintenance, click on Employee Maintenance in the employee validation main page.
The first step in setting up Employee Validation is to define all the Employees in the Employee Maintenance module.
Listing employees
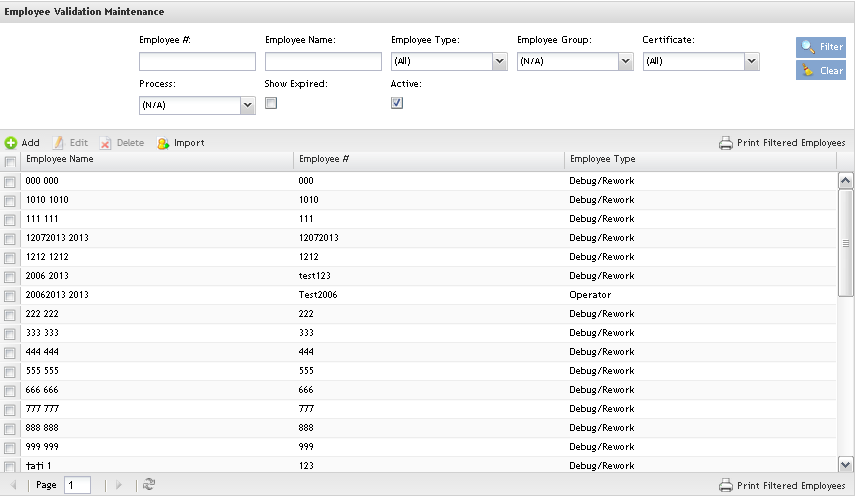
The Employee List displays all employees by name, type, and number. Employee maintenance allows users to add, edit, delete, and import employees.
Figure 3: Employee Maintenance Page
Performing Searches
It is possible to search the database using the fields provided (e.g., Employee #, Employee Name, Employee Type). When performing a search, enter employee information into the appropriate field(s) and click Filter.
Figure 4: List and Search Employees
The search result is displayed in the Employee list.
Note: It is possible to list only the active employees by checking the Active check box.
Adding Employee
To add an employee record,
- Click Add. Alternatively, a number of records can be imported using the Import function (see below).
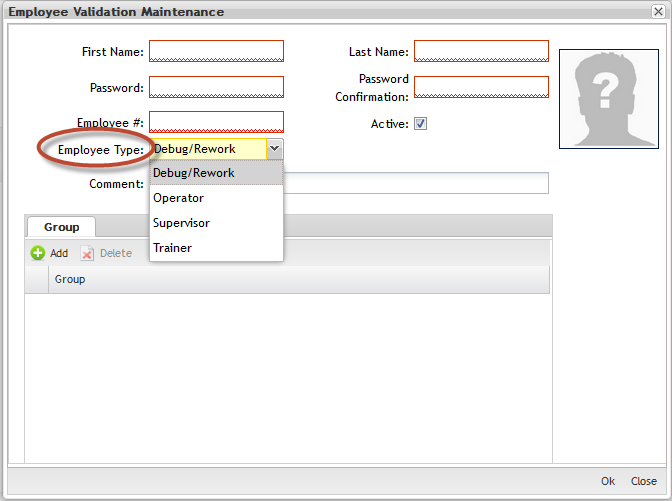
- Complete all mandatory fields in the Employee Validation Maintenance popup:"First Name", "Last Name","Password", "Password Confirmation", "Employee#", "Employee Type" (operator, supervisor or trainer).
Trainers are the people used to create a class. Someone has to be a designated trainer, in order to create a class in EV. They are also the people typically holding "classes" and performing any hands on training.
- Operators are the production folks who perform work. They either have the certification to perform a job or not. That is the EV control for processes.
- Supervisors are required to be in EV and have at least 1 certificate. They do not necessarily have to be in every certificate in order to be able to scan serial numbers through the processes. Effectively, they are "superusers" which can scan serial numbers through any process, without having the actual certification. They just must have 1 certification for something.
- Debug/Rework are the production folks who perform work with debug/rework roles;
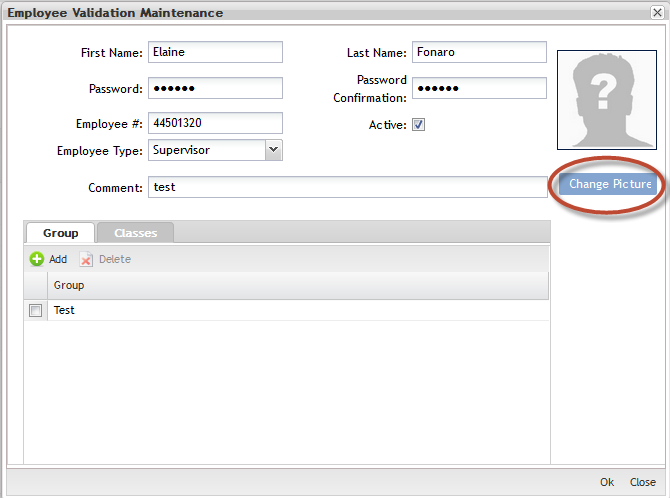
- Click onChange Picture to add the Employee image.
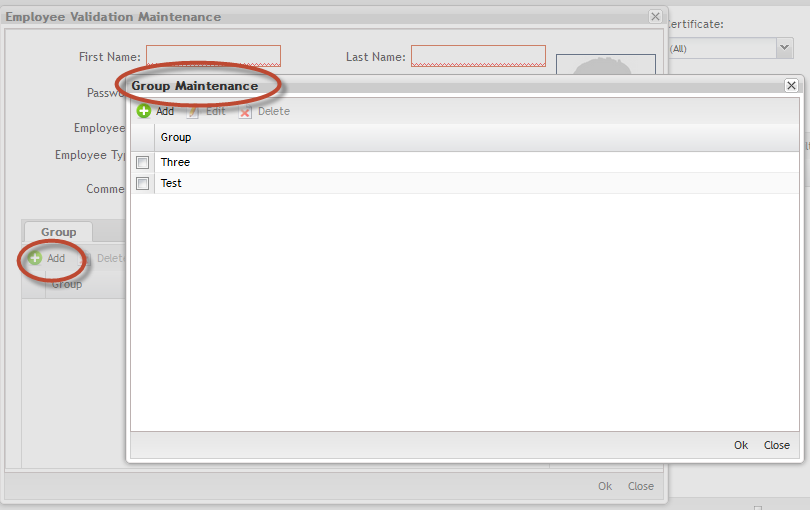
After Employee records have been created, each employee should be associated to at least one Group.
Group Maintenance:
To add, edit, delete and undo groups, go to group maintenance;
1. Click on Maintenance button to open the Groups Maintenance popup.
Figure 7: Groups Maintenance
After insert the employee data, the user is able to upload the employee image, or if prefer, upload the image in the future using the Edit Employee button.
Figure 8: Uploading Employee Image
Click on Y'es' to continue the upload or No to abort.
Click on Change Picture to upload and save the image.
Importing Employees
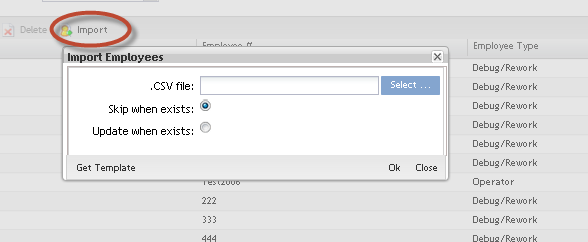
To Import Employees from a CSV file, click on Import.
Figure 9: Import Employees
The Import employee is displayed.
Note: Selecting Skip when exists, the user will not be updated.
This functionality allows importing employees in mass.
The format of the .csv file for importing Employee records is:
| First Name | Last Name | Password | Employee # | Employee Type |
| Character | Character | Character | Character | Character |
After creating the spreadsheet, follow the steps below to import:
- Go toEmployee Maintenance page and click on "Import" button.
- Select the .CSV file already created.
- Click on "OK" button.
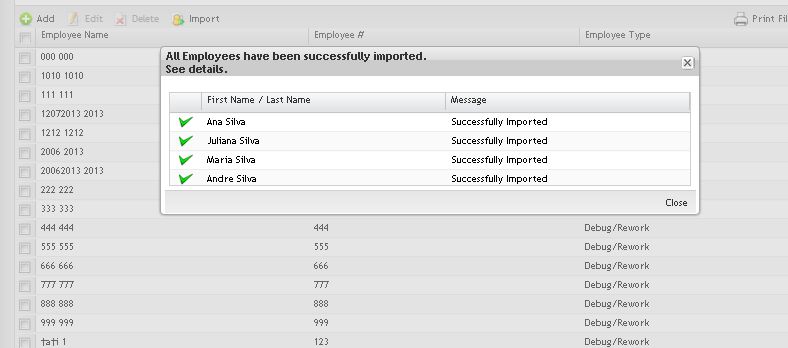
TheImport Employee Results page with the import results is displayed:
Figure 10: Import Employees
- Click on "Close" button.
After the import process, a report is displayed with the employees successfully imported and with those who failed.
Print Filtered Employees
To Print Filtered Employees list, click on Print Filtered Employees button.
A .pdf report is generated with classes, certificates and processes. The user can save it and print.
Editing Employees Information
Figure 12: Editing Employee Information
It is possible to edit the employee information by selecting the employee and clicking on Edit button.
The steps to edit employees are the same as Add Employees. See Add Employee section for more information.
Deleting Employees Information
Delete the employee by selecting the employee and clicking on Delete button.
Figure 13: Deleting Employees
NOTE:
1. The deleted employees will be removed from classes also.
2. The application does not allow removing a Trainer that is assigned to a class.


