Difference between revisions of "How to manage Calibration in CMMS"
Jump to navigation
Jump to search
| Line 18: | Line 18: | ||
| | ||
| − | = <span class="mw-headline" id="Assign_the_Calibration_Group_to_Assets"><span class="mw-headline" id="Assign_the_Calibration_Group_to_Assets"><span class="mw-headline" id="Assign_the_Calibration_Group_to_Assets"><span class="mw-headline" id="Assign_the_Calibration_Group_to_Assets">Assign the Calibration | + | |
| + | = <span class="mw-headline" id="Assign_the_Calibration_Group_to_Assets"><span class="mw-headline" id="Assign_the_Calibration_Group_to_Assets"><span class="mw-headline" id="Assign_the_Calibration_Group_to_Assets"><span class="mw-headline" id="Assign_the_Calibration_Group_to_Assets"><span class="mw-headline" id="Assign_the_Calibration_Group_to_Assets">Assign the Calibration group to assets</span></span></span></span></span> = | ||
| | ||
Revision as of 22:44, 21 January 2022
Contents
Configure the Calibration group
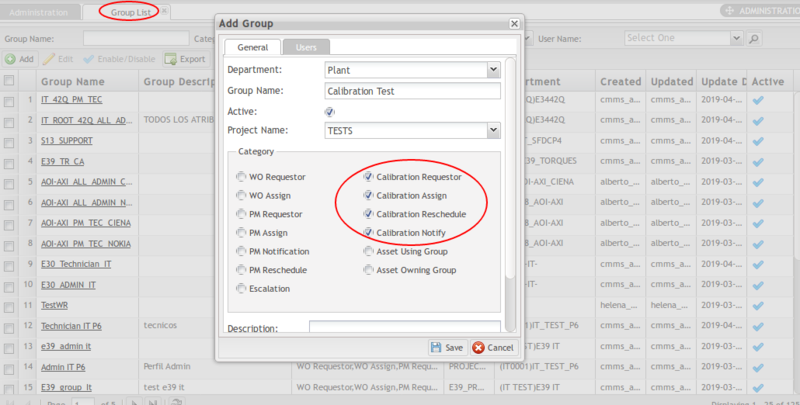
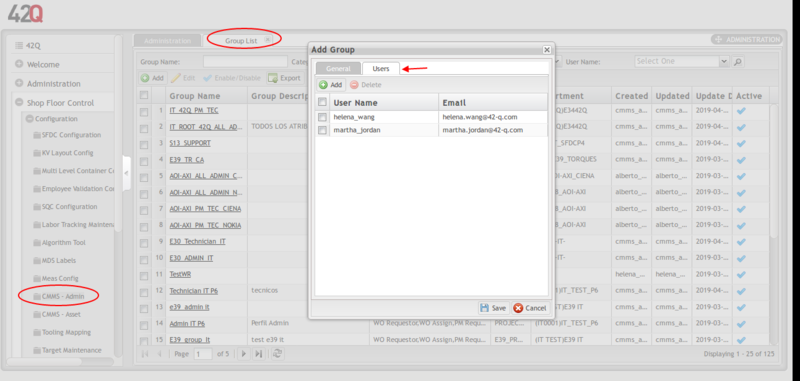
- Go to: Shop Floor Control > Config > CMMS Admin > Group.
- Add a new Calibration Group or edit an existing Calibration Group.
- Select the Calibration Categories at the General tab as needed.
- Go to the Users tab and add Users one at a time.
Figure 1: Set Group Category
Figure 2: Add Group’s Users
Assign the Calibration group to assets
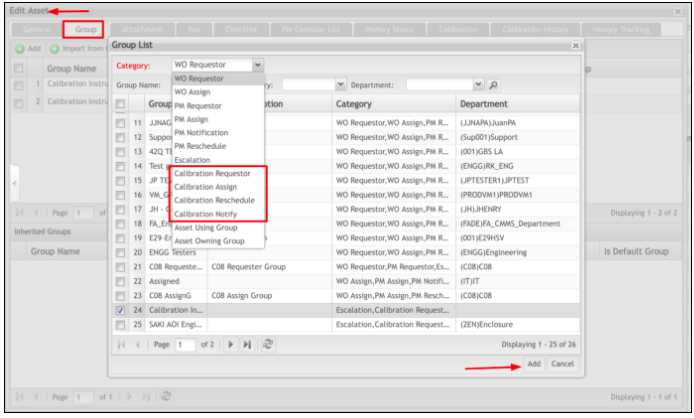
- Go to: Shop Floor Control > Config > CMMS Asset and select the Asset to edit.
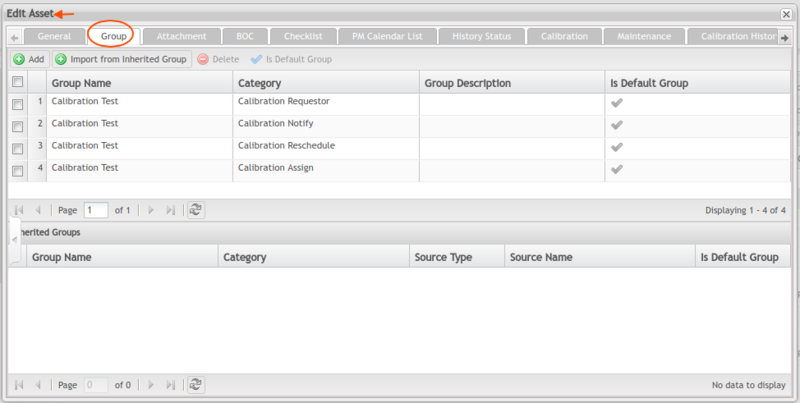
- Add Calibration Categories to this Asset's Group:
- Go to Group Tab.
- Add Calibration Categories one at a time.
Figure 3: Set Calibration Category
Figure 4: Set Group for Asset
Assign the Calibration.
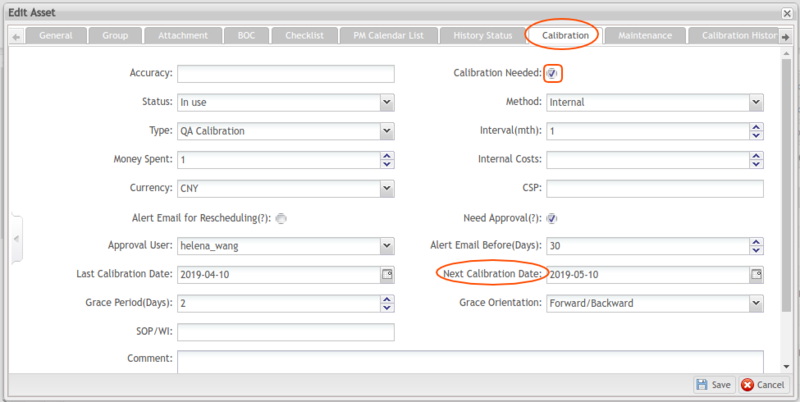
- At the Edit Asset Page, move to the Asset’s Calibration Tab.
- Complete the following mandatory fields:
- Calibration Needed checkbox.
- Last Calibration Date
- Interval (mth)
- The system will populate the Next Calibration Date based on the Last Calibration Date and the number of months selected in the Interval section.
- Grace Period(Days).
- Complete the other optional fields if needed.
- Save.
Figure 5: Edit Asset Calibration Tab
- Email notification goes to the Assigned group members, including Requester and Approver.
Figure 6: Assigned Alter Email
Complete the Calibration on the Asset
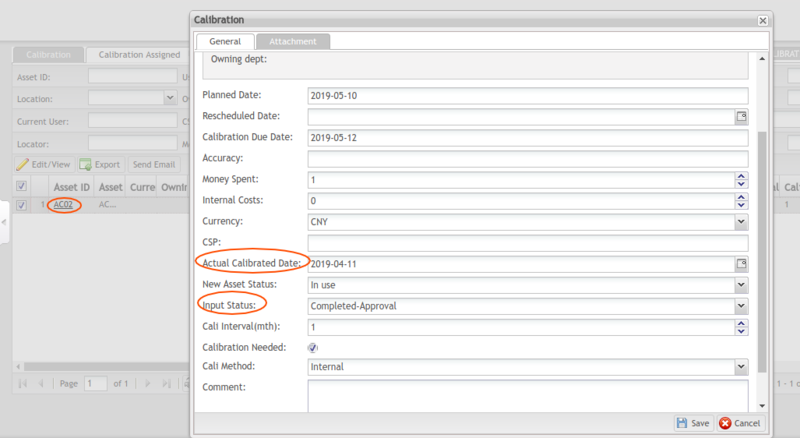
- Go to:Production > CMMS Calibration > My Assigned.
- Double click on the Asset Name.
- Fill out the following mandatory fields:
- Input Status
- Actual Calibrated Date
Note: Only the Input Statu be set to Complete - Approval, this calibration Asset’s go to the approval process.
- Fill out other optional fields if needed.
- Save.
Figure 7: Calibration Assigned
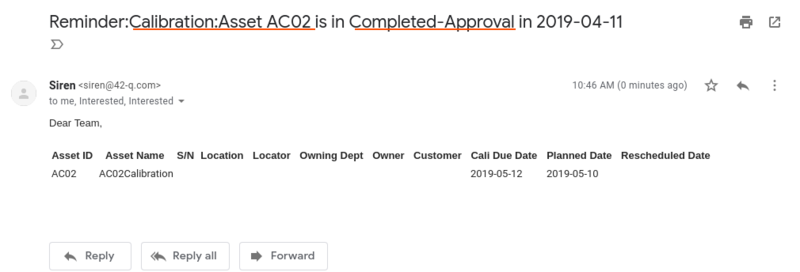
- Email notification goes to the Approver and the assigned group members (this person was selected when the Calibration needs approver) (Step 2).
Figure 8: Status Change alter Email
Approve (or Reject) the Calibration
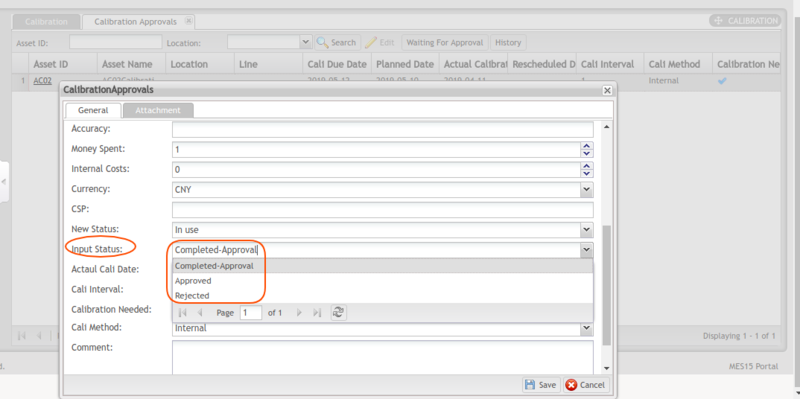
- Go to: Production > CMMS Calibration > My Approvals.
- Double click on the Asset Name.
- Complete the following mandatory fields:
- Input Status: Select Approved or Rejected.
- Actual Cal Date.
- Save.
Figure 9: Calibration Approval
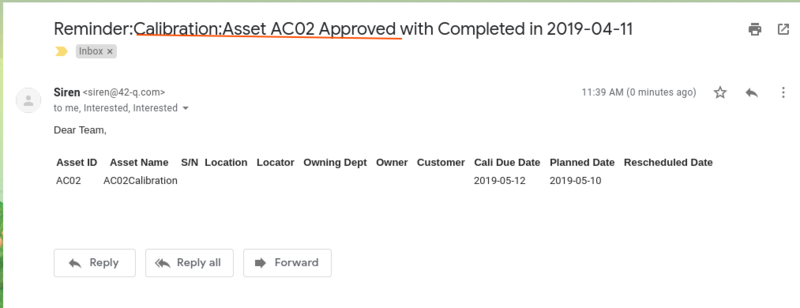
Email notification goes to the approver, requester, and assigned group members.
Figure 10: Approval Alter Email
Reschedule the Calibration
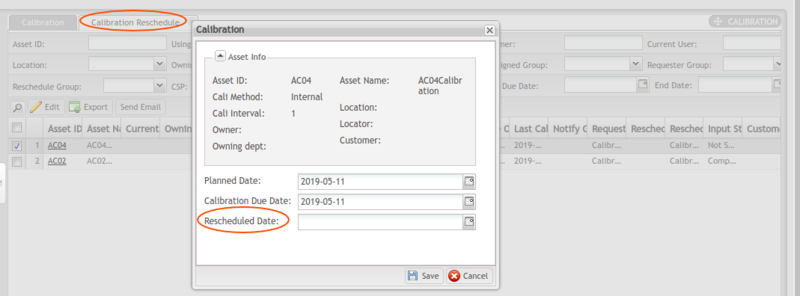
- Go to:Production > CMMS Calibration > My Rescheduling.
- Double click on the Asset Name.
- Complete the following mandatory fields:
- Rescheduled Date.
- Save.
Figure 11: My Rescheduling
