How to Manage a Customized Request
Contents
Summary
The CMMS ( Computerized Maintenance Management System) is a list of tools developed for companies to manage their plant’s assets at building life-enhancing products.
Benefits of CMMS Mobile
In this document, production supervisors, engineers, technicians, and operators (users) will know how to create, assign, consult, set, and gather information about Repair or Checklist Work Orders.
What can I do with the CMMS Mobile Work Order?
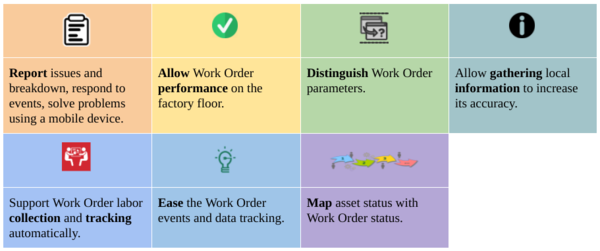
Production supervisors, engineers, technicians, and operators can:
How to log in to CMMS Mobile Work Order on a mobile device or PC?
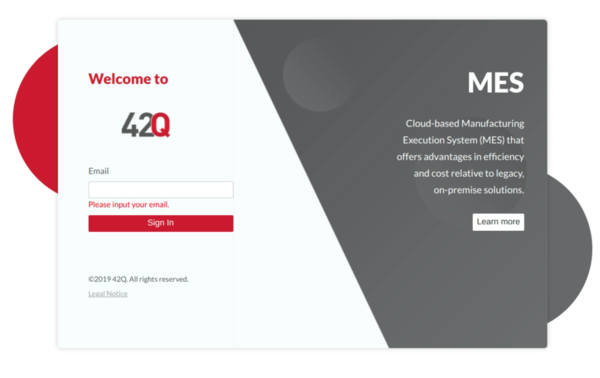
To work with these features, users can simply open the CMMS Mobile Work Order by login in with their credentials at https://portal-uat-cmms.42-q.com.
Figure 1: Login CMMS Mobile.
How to search or filter Work Orders?
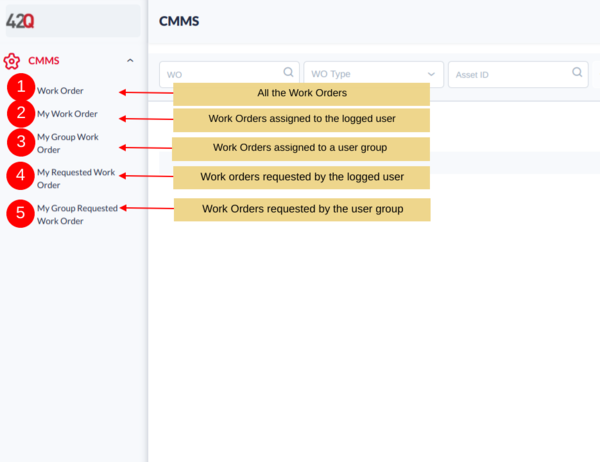
Users can do easy research, distinguish parameters, and gather information on Work Orders according to the chosen section in the principal menu, located at the right side of the screen.
If the users are technicians or operators, they can access the Work Orders assigned to them or to their group. If users are requesters, they can create Work Orders and have precise visibility of their execution to know the status of a requested Work Order.
TIP: Users can also export a Work Order as a .csv file to share, print, or save on desktop (not supported at Phase I).
Figure 2: Principal Menu of CMMS Mobile Work Order.
To search filtered information users can add up to nine categories with the +MORE icon located beside the search field, at the top of the chart: Summary, WO Type, Asset ID, Line Name, Project, Problem, Priority, Status, and Creation Date.
Figure 3: +MORE icon to display the filtering options
How to Add a Repair or Checklist Work Order?
Suppose that an operator finds a machine down and this event must be reported to the machine maintenance team by creating a Repair Work Order. Or an engineer detects that there is a problem in the production line or the assets that must be arranged urgently; a Checklist Work Order can be created with specific items.
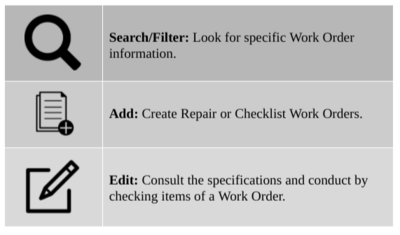
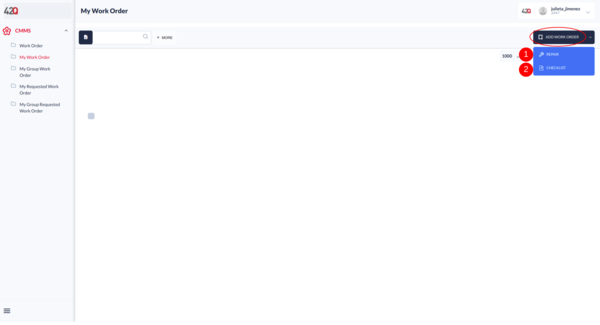
To create a Repair or a Checklist Work Order click in the +ADD WORK ORDER icon, located at the top left corner. A pop-up box will be displayed to fill in the required fields with the information needed to proceed.
Figure 4: +ADD WORK ORDER icon and submenu.
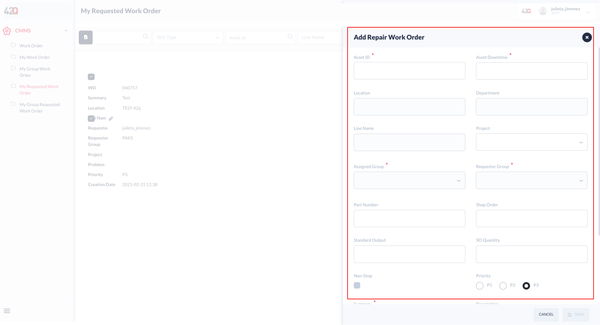
Each option has mandatory fields (eg. Asset Downtime, Assigned Group, Requestor Group, Summary, and others), and optional fields (Line Name, Part Number, Shop Order, Standard Output, and others).
Repair Work Order: This can be added to ask for the repair of a detected problem in a machine.
Note: The most important field to fill in is the Asset ID because it indicates which machine needs to be repaired.
Figure 5: Add Repair Work Order Fields
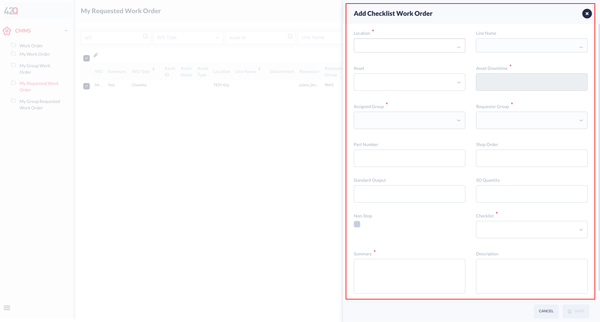
Checklist Work Order: Can be added to restore a machine to a normal yield or quality level in case of:
- Arrange urgent or intermittent maintenance for a location, a production line, or a machine on a Shop Floor inspection.
- When considering any product quality status.
The mandatory fields are: Location (it refers to the physical location), Assigned Group, Requestor group, and Checklist (check items).
Figure 6: Add Checklist Work Order fields
How to Conduct a Work Order?
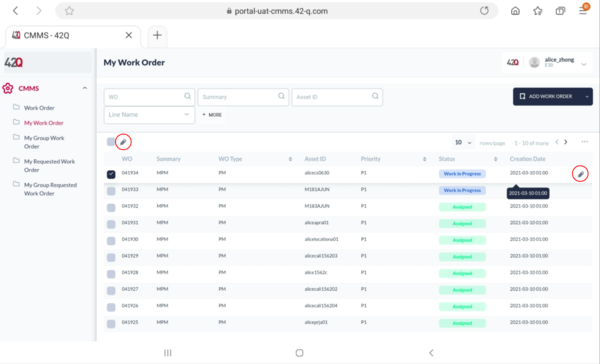
Every Work Order information can be consulted or edited by users. To do so check the box of the selected Work Order and click on the Edit icon. A pop-up box with six information tabs will appear: General, Checklist, Labor, Attachment, Work Log, and WO BOC.
Figure 7: Edit Work Order icon
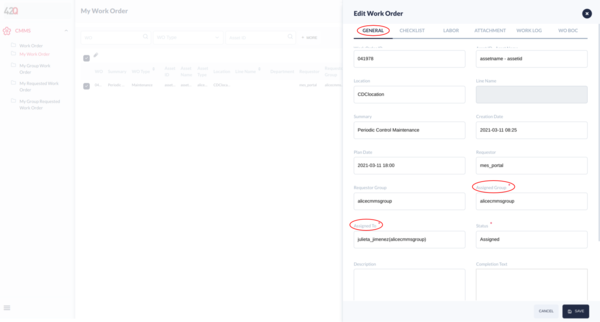
General tab: To find general information about the selected Work Order. The “Assigned To” and “Assigned Group” fields are mandatory to let the person in charge know what to do, when, and why according to the defined workflow.
Figure 8: General tab - Edit Work Order
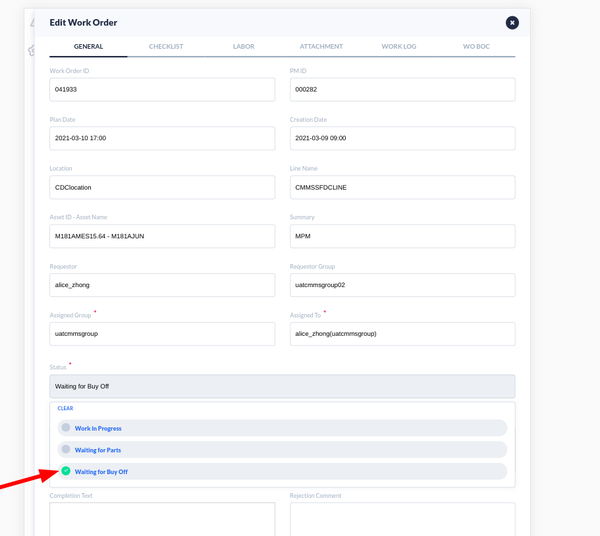
Note: After completion, it is important to close the Work Order by selecting the status “Waiting for Buy Off” in the General tab.
Figure 9: Waiting for Buy Off button to close Work Order
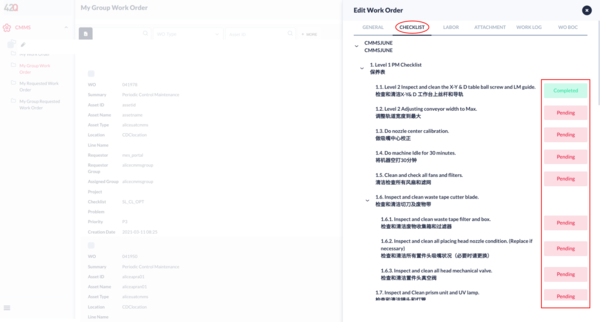
Checklist tab: To follow the assigned steps to complete the task with absolute control of execution during maintenance. The user should check items completed with the “Pending” button.
Figure 10: Checklist tab - Edit Work Order
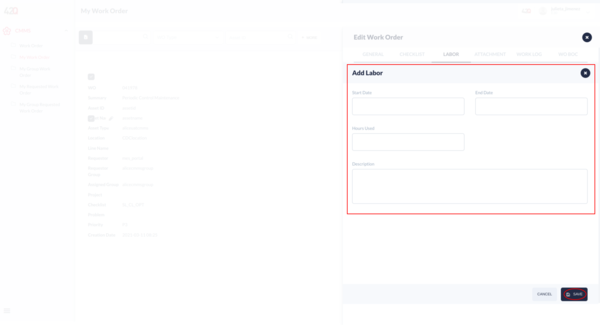
Labor tab: To report how much time was spent in the work order. The user should fill in with the Start and End Time information.
Figure 11: Add Labor pop-up - Edit Work Order
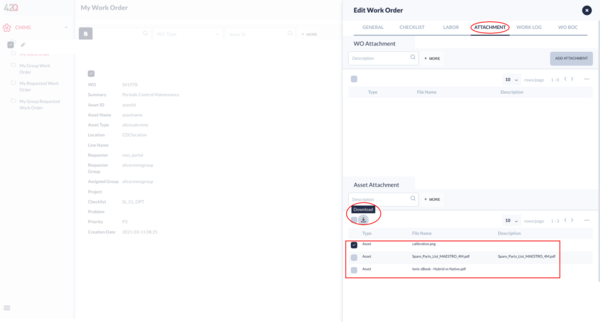
Attachment tab: To attach or see attachments that will help as a reference to complete the Work Order, such as a How-to document about the correct maintenance of that asset.
Figure 12: Attachment tab - Edit Work Order
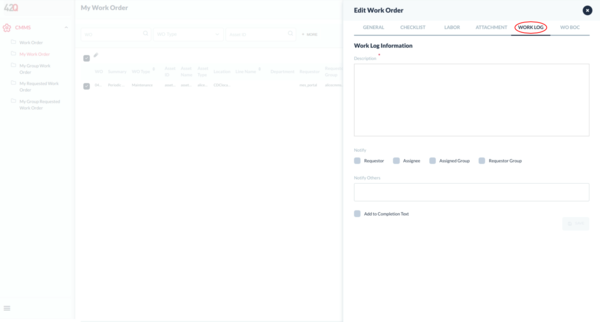
Work Log tab: To share extra information about the Work Order with collaborative purpose via email notification.
Figure 13: Work Log tab - Edit Work Order
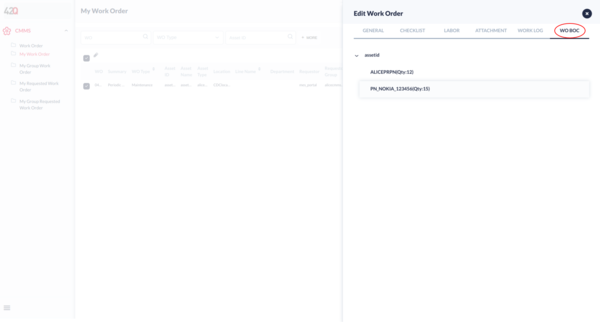
WO BOC tab: To see the reserved part for this Work Order or this asset. Is displayed for reference purpose only.
Figure 14: WO BOC tab - Edit Work Order
Note: To know more details, please go to CMMS Mobile SOP.
